The importance of backing up your data has been brought up in this website before. That post was more targeted towards backing up your computer data.
In the realm of smartphones, where our devices serve as repositories for our most cherished memories, contacts, and important documents, the need for data backup becomes even more pronounced. With our lives increasingly intertwined with our mobile devices, the consequences of losing data can be catastrophic.
Consider the heartbreak of losing irreplaceable photos capturing precious moments, or the frustration of realizing your entire contact list has vanished in an instant. To verify how important this is just ask yourselves a very simple question:
If my phone breaks or gets stolen tomorrow, do I have all my data safe and recoverable? Do I have my photos, contacts, calendar etc?
I would bet that for a significant number of you the answer is… NO!
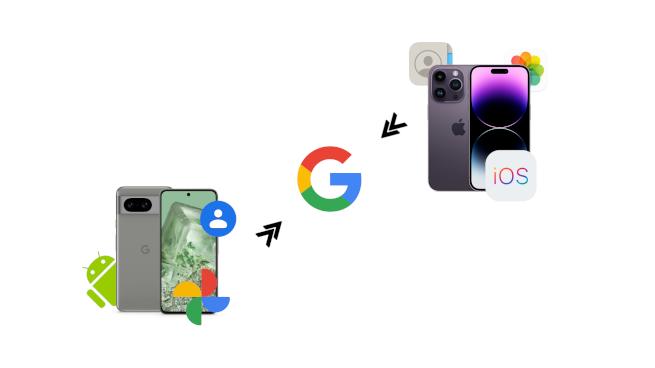
Both Android and iPhone platforms offer backup solutions for the data stored on your device. However both platforms have limitations.
Android is fragmented so much that each manufacturer has its own solutions, which most of the times are not compatible with other brands.
The iPhone stores data on iCloud, introducing a range of issues as the Apple ecosystem is often likened to a ‘walled garden’ that discourages transferring data to other platforms. While your data may technically be safe on iCloud, the process of recovering this data on a different platform is not straightforward. Without your old iPhone to connect to your new Android phone for data transfer, you must manually download the data from iCloud and then transfer it to Android. This process is neither simple nor quick.
This post will try to provide simple solutions which are platform agnostic to safely backup your data and easily restore them to the platform of your choice with minimum effort and time. SO LET’S GET STARTED!
PHOTOS
Backing up photos from your smartphone is crucial for safeguarding precious memories and ensuring they’re not lost in case of device damage or loss.
Easiest way to do this is by having all your photos sync with the Google Photos app. Google Photos is available for both Android and iOS and also has a very intuitive web interface so you can access your photos from any device with a browser.
Step 1: Download and Install Google Photos
- Android Users:
– Open the Google Play Store.
– Search for “Google Photos” and tap on the official app.
– Tap “Install” and wait for the app to download and install on your device.
- iPhone Users:
– Launch the App Store on your iPhone.
– Search for “Google Photos” and select the official app.
– Tap “Get” and then “Install” to download and install the app on your iPhone.
Step 2: Sign in or Create a Google Account
– Open the Google Photos app.
– If you already have a Google account, sign in with your credentials.
– If not, tap on “Create account” and follow the on-screen instructions to set up a new Google account.
Step 3: Configure Backup Settings
- Android Users:
– After signing in, Google Photos will prompt you to set up backup options.
– Choose whether to backup photos using Wi-Fi or mobile data.
– Select the quality for your backups (High quality or Original).
- iPhone Users:
– Open the Google Photos app and sign in.
– Tap on your profile picture in the top-right corner.
– Select “Photos settings” > “Back up & sync.”
– Toggle the switch to enable “Back up & sync.”
– Choose the upload size for your photos (High quality or Original).
Step 4: Backup Photos
- Android Users:
– Once your backup settings are configured, Google Photos will automatically start backing up your photos.
– You can also manually initiate a backup by opening the Google Photos app and tapping on the “Backup” button.
- iPhone Users:
– After enabling “Back up & sync,” Google Photos will begin backing up your iPhone photos.
– You can manually trigger a backup by opening the app and tapping on the “Library” tab, then selecting “Photos” and tapping the cloud icon with a slash through it to initiate the backup.
Step 5: Access Your Backed-up Photos
– Once your photos are backed up, you can access them from any device with internet access.
– Simply open the Google Photos app or visit photos.google.com on your computer.
– Sign in with the same Google account used for backup to view your photos and videos.
Conclusion:
Backing up your phone photos to Google Photos ensures that your precious memories are safe and accessible, even if you lose or upgrade your device. By following the steps outlined in this guide, both Android and iPhone users can easily safeguard their photos in the cloud, providing peace of mind for years to come.
CONTACTS
In addition to backing up your photos, safeguarding your contacts is crucial to ensure you don’t lose valuable connections and essential information stored on your phone. Google Contacts provides a seamless way to store and sync your contacts across devices. In this guide, we’ll walk you through the steps to backup your phone contacts to Google Contacts, tailored for both Android and iPhone users.
Step 1: Sign in or Create a Google Account
If you don’t already have a Google account, you’ll need to create one to use Google Contacts.
- Android Users:
– Go to “Settings” on your Android device.
– Scroll down and select “Accounts.”
– Tap “Add account” > “Google,” then follow the prompts to sign in or create an account.
- iPhone Users:
– Open the Settings app on your iPhone.
– Scroll down and select “Passwords & Accounts.”
– Tap “Add Account” > “Google,” then sign in or create a Google account.
Step 2: Transfer Contacts to Google Contacts
From SIM Card:
- Android Users:
– Open the Contacts app on your Android device.
– Tap the menu icon (three vertical dots) or “More” option.
– Select “Settings” > “Import/Export” > “Import from SIM card.”
– Choose where to save the contacts (Google account), then follow the prompts to import.
- iPhone Users:
Unfortunately, iPhones don’t directly support transferring contacts from the SIM card to Google Contacts. However, you can export contacts from your iPhone to a file and then import them into Google Contacts using a computer or another device.
From Smartphone:
- Android Users:
– Open the Contacts app on your Android device.
– Tap the menu icon (three vertical dots) or “More” option.
– Select “Settings” > “Import/Export” > “Export to storage” or “Export to .vcf file.”
– Choose the contacts you want to export and save them to your device.
– Once saved, open Google Contacts, tap the menu icon, and select “Import.” Choose the file you exported, and follow the prompts to import your contacts.
- iPhone Users:
– Open the Contacts app on your iPhone.
– Tap the contact you want to export, then tap “Share Contact” and select the method of transfer (e.g., email, message).
– Send the contact to yourself or save it on another device.
– Once saved, open Google Contacts on the device where you saved the contacts, tap the menu icon, and select “Import.” Choose the file you received, and follow the prompts to import your contacts.
Step 3: Sync Contacts with Google Account
After transferring your contacts to Google Contacts, ensure they are synced with your Google account:
– Android Users: Go to “Settings” > “Accounts” > “Google” and ensure that “Contacts” sync is enabled.
– iPhone Users: In “Settings” > “Passwords & Accounts,” make sure that the “Contacts” option is enabled for your Google account.
Step 4: Verify Contacts Sync
To verify that your contacts are syncing with your Google account:
– Android Users: Open the Contacts app, tap the menu icon, and select “Settings.” Under “Accounts,” ensure that your Google account is listed and syncing contacts.
– iPhone Users: Open the Contacts app, tap “Groups,” then ensure that your Google account is selected under “Gmail” or “Contacts.”
Step 5: Backup Contacts to Google Contacts
– Once contacts sync is enabled, your contacts will automatically be backed up to your Google account.
– You can manually initiate a sync or backup through the Contacts app settings or your device’s Google account settings.
Step 6: Access Your Backed-up Contacts
– You can access your backed-up contacts on any device by signing in to your Google account.
– Visit contacts.google.com on a computer or open the Google Contacts app on your smartphone.
– Sign in with the same Google account used for backup to view and manage your contacts.
Conclusion:
Backing up and syncing your phone contacts with Google Contacts provides a convenient and reliable way to ensure that your valuable contact information is always accessible and secure. By following the comprehensive steps outlined in this guide, both Android and iPhone users can effortlessly transfer, backup, and manage their contacts with ease, providing peace of mind and seamless connectivity across devices.
CALENDAR
Efficiently managing your schedule is crucial for staying organized and productive. Google Calendar offers a robust platform for scheduling events, tasks, and reminders, accessible across devices. In this guide, we’ll walk you through the steps to transfer your existing calendar from your smartphone to Google Calendar and set it up as your primary calendar on both Android and iPhone devices.
Step 1: Download and Install Google Calendar
- Android Users:
– Open the Google Play Store.
– Search for “Google Calendar” and tap on the official app.
– Tap “Install” and wait for the app to download and install on your device.
- iPhone Users:
– Launch the App Store on your iPhone.
– Search for “Google Calendar” and select the official app.
– Tap “Get” and then “Install” to download and install the app on your iPhone.
Step 2: Sign in or Create a Google Account
– Open the Google Calendar app.
– If you already have a Google account, sign in with your credentials.
– If not, tap on “Create account” and follow the on-screen instructions to set up a new Google account.
Step 3: Transfer Existing Calendar to Google Calendar
Export Calendar from Smartphone:
- Android Users:
– Open the native Calendar app on your Android device.
– Tap on the menu icon (three vertical dots) or “More” option.
– Select “Settings” > “Export” > “Export to .ics file” or “Export to storage.”
– Choose the calendar you want to export, then save the file to your device.
- iPhone Users:
– Open the native Calendar app on your iPhone.
– Tap on the calendar you want to export to select it.
– Tap on the “Share” icon (usually represented by a square with an arrow pointing up) and select “Email.”
– Email the calendar to yourself or save it on another device.
Step 4: Import Calendar to Google Calendar
Once you’ve exported the calendar from your smartphone:
– Open Google Calendar on the device where you saved the calendar file.
– Tap on the menu icon (three horizontal lines) in the top-left corner.
– Select “Settings” > “Import & export” > “Import” or “Import calendar.”
– Choose the calendar file you exported from your smartphone and follow the prompts to import it into Google Calendar.
Step 5: Sync Google Calendar with Your Device
- Android Users:
– Upon signing in, Google Calendar will automatically sync with your Google account, including events from the imported calendar.
– You can customize which calendars to display in the app settings.
- iPhone Users:
– After signing in, tap on the menu icon (three horizontal lines) in the top-left corner.
– Select “Settings” > “Show more” > “Manage accounts.”
– Ensure that your Google account is listed and synced with Google Calendar.
Step 6: Set Google Calendar as Default Calendar
- Android Users:
– Go to your device’s Settings.
– Scroll down and select “Apps” or “Applications.”
– Find and tap on “Calendar” or “Calendar storage.”
– Tap on “Set as default” or “Default apps.”
– Choose “Google Calendar” as the default calendar app.
- iPhone Users:
Unfortunately, iOS does not allow users to change the default calendar app. However, you can set up your Google Calendar to sync with the built-in iOS Calendar app, providing access to your events.
Step 7: Add and Manage Events in Google Calendar
– To add events, tap the “+” icon in the Google Calendar app.
– Enter the event details, including title, date, time, location, and any additional information.
– You can set reminders, invite guests, and add attachments to your events.
– Customize your calendar view by day, week, month, or agenda to easily manage your schedule.
Step 8: Access Your Calendar Across Devices
– Your Google Calendar will sync seamlessly across all devices connected to your Google account.
– You can access and manage your calendar events from the Google Calendar app on your smartphone, tablet, or computer.
Conclusion:
By transferring your existing calendar to Google Calendar and setting it up as your primary calendar on your smartphone, you gain access to a versatile scheduling tool that syncs seamlessly across devices. Follow the comprehensive steps outlined in this guide to ensure that your schedule is organized, accessible, and efficiently managed, helping you stay productive and on track with your commitments.
Incorporating Google’s suite of tools into your digital life not only streamlines organization but also ensures the safety and accessibility of your valuable data. By following the steps outlined in this guide, you can effortlessly back up your photos, contacts, and calendars to Google Photos, Google Contacts, and Google Calendar, respectively. Whether you’re an Android or iPhone user, the seamless integration of Google’s services provides peace of mind, knowing that your memories, connections, and schedules are securely stored in the cloud, ready to be accessed from any device, anywhere, anytime. Take control of your digital life with Google, and enjoy the convenience and reliability it brings to your everyday tasks.


