The Raspberry Pi, with its very small size and low power usage makes for the perfect device for projects requiring 24/7 operation, whether this is a NAS or a Plex Media Server. While you can get away with using your more powerful computer as a Plex Server (has the benefit of transcoding media and streaming it outside your network, something the Pi is too weak to do) it’s not exactly convenient to have a PC constantly running in the background.
Raspberry Pi is an excellent choice if you need something cheap and easy to set up to experiment with your first server.
In this post I will walk you through how to setup a Plex Server on your Raspberry Pi. You need to manage your expectations though. Don’t expect it to be a powerhouse. It will not be able to stream the latest 4K 10bit movie you downloaded but It can handle multiple streams of full HD video on your local network just fine. This means you can watch your favorite movie while another member of your family catches up on his/hers favorite TV Show. It should be able to handle 3-4 simultaneous local HD (1080p) streams just fine.
What are the requirements for a Raspberry Pi Plex server?
To use Raspberry Pi as a Plex server you require a Raspberry Pi, but more specifically, a newer model – Raspberry Pi 3 or better still Raspberry Pi 4.
This is important to make sure you have enough processing power and memory to run both the Operating System and the Plex Media Server software. Both versions have an Ethernet port as well as an integrated WiFi module, making it perfect for setting up a wired or wireless streaming platform.
In addition, a large enough microSD is necessary to ensure you have sufficient storage space for the Plex Media Server and media files should you wish to store them there. However, I would recommend hooking up an external USB drive that will hold your movies & TV Series or a Shared Folder through a NAS or another device on your network which makes it easier to transfer files on your server’s library as well.
You can follow this post to walk you through the initial setup of your Raspberry Pi. Once your Raspberry Pi has an operating system and its working properly you can proceed with the instructions below to setup Plex Media Server.
How to Set Up a Raspberry Pi Plex Server
Before proceeding with using your Raspberry Pi as a Plex server it’s best to perform an update. Open a new terminal and run the following commands:
sudo apt-get update
sudo apt-get upgrade
Install any updates available.
Once any updates are finished you can proceed to install Plex Media Server. Before doing so, it’s necessary to add the Plex package repository which requires installing the apt-transport-https package. This allows the apt package manager to obtain packages over an https protocol. Enter the command in the terminal:
sudo apt-get install apt-transport-httpsWith the apt-transport-https package successfully installed, it’s time to add the Plex repositories to the apt key list. This verifies that any files you download from the Plex repo are signed with that key. Add the Plex key:
curl https://downloads.plex.tv/plex-keys/PlexSign.key | sudo apt-key add -Now that the Plex key is added, you can go ahead and add the official Plex repository:
echo deb https://downloads.plex.tv/repo/deb public main | sudo tee /etc/apt/sources.list.d/plexmediaserver.listAfter that’s finished, run an update again:
sudo apt-get updateBecause the Raspberry Pi is now configured to read the official Plex package repositories, you can install Plex Media Server with:
sudo apt-get install plexmediaserverThe Plex Media Server package comes pre-configured for a default user of plex. But it’s a good idea to change this to pi instead to avoid any potential permission problems as the default user on the Raspberry Pi is pi.
To do this open the /etc/default/plexmediaserver file using a text editor such as Nano:
sudo nano /etc/default/plexmediaserverFind the PLEX_MEDIA_SERVER_USER line and change that from plex to pi.
Next, find:
export PLEX_MEDIA_SERVER_USER=plex
and change it to:
export PLEX_MEDIA_SERVER_USER=pi
Save when you’re finished with CTRL + X, then hitting Y and Enter. Next, restart the Plex media server service using:
sudo systemctl restart plexmediaserverPlex should now be properly installed on the Raspberry Pi.
Setting a Static IP on the Raspberry Pi
Although your Raspberry Pi Plex Media Server should be technically ready to begin streaming, it’s a best practice to establish a static IP on your Raspberry Pi. To set a static IP address on your Raspberry Pi you can follow this guide.
Adding External Media to the Raspberry Pi
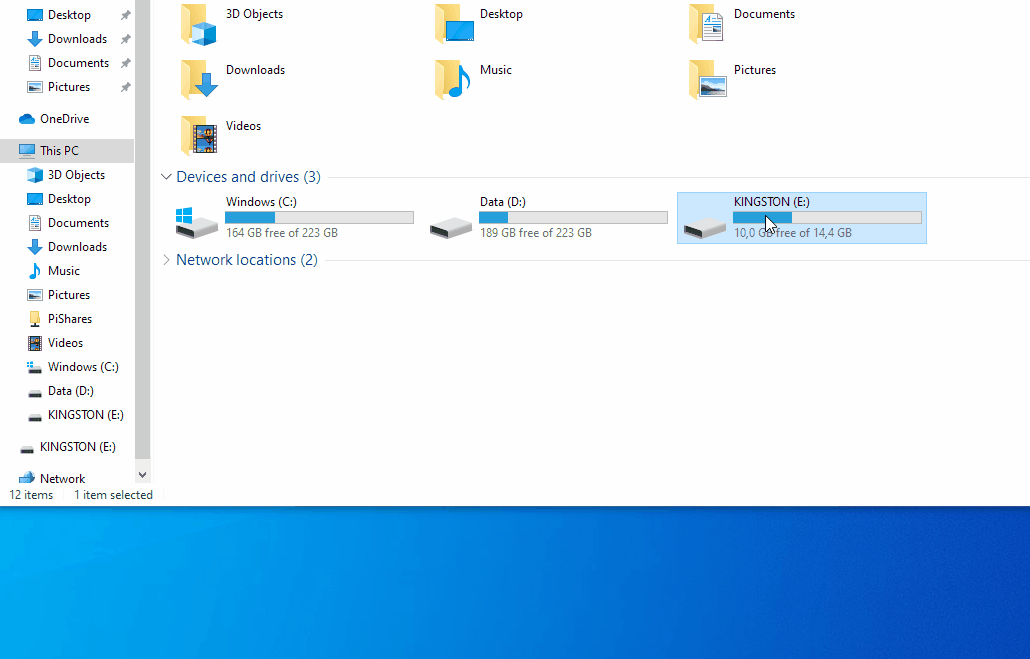
If you are anything like me then over the years you amassed a massive media collection which the microSD card on your Raspberry Pi microSD card might not be sufficient to hold. As such, you’ll need to use an external drive such as a flash drive or hard drive. Any drives you connect to your Raspberry Pi’s USB ports should automatically become available (just like in Windows).
If you’re using an NTFS formatted drive, install the NTFS 3G package. If you have no idea what NTFS is and just purchased a USB drive to use on your Plex Media Server, chances are that it is formatted FAT32 and you don’t need to perform the following command.
sudo apt-get install ntfs-3gNote: FAT32 formatted drives cannot hold files which are bigger than 4GB in size. Thus, if you plan to download media which exceeds that size is best to format it as NTFS.
To do this in Windows just right click on the drive and select Format. Then select the NTFS option and proceed to format the drive.
Configure Plex on the Raspberry Pi
With Plex installed and your external drives set up, it’s time to configure Plex on the Raspberry Pi. You can proceed as in any other Plex Media Server installation. You can follow this guide to import your libraries and have everything working.