Plex Media Server is a powerful and user-friendly way to store all your downloaded movies and TV shows in one place and make it accessible from any device (computers, tablets, phones) whether you are at home or out and about. You can even easily share that content with friends and family.
So, if you’re looking for a no-headache way to store, organise and watch your media library anywhere, this is it.
Why use Plex Media Server?
Here’s a common situation that all too many people find themselves in. You have spent a ton of time building up your media library with all sorts of movies and TV shows. Every time you want to watch something though you either have to copy the files over to the device you want to watch them on or spend time configuring each device to obtain access to a shared folder storing the media.
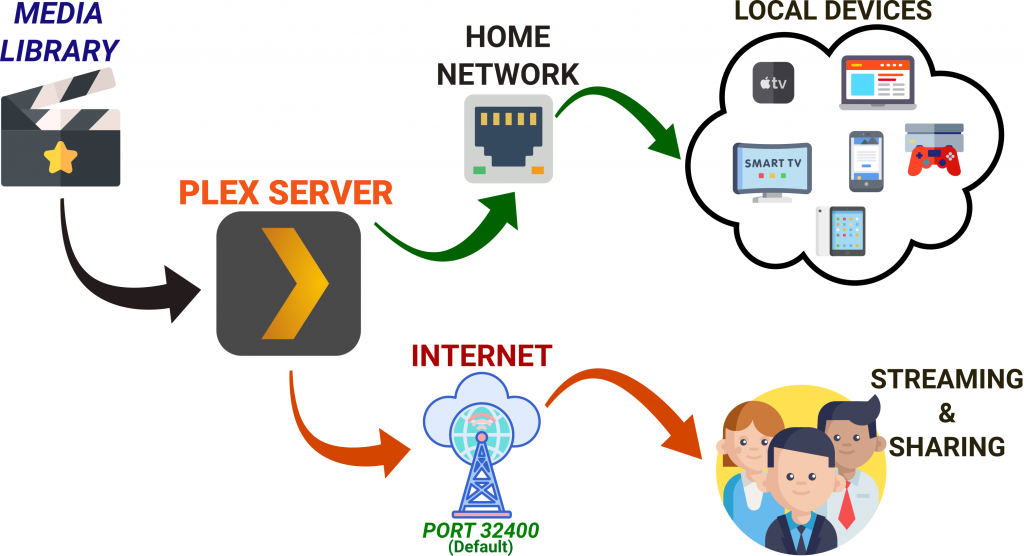
Plex operates as a centralized media server system that eliminates the issue above by streamlining the process of managing, organising and streaming media.
Pick the Hardware to run Plex on
The Plex model is simple: you store all your media on a single device with the Plex Server software installed, and then you install the Plex client on all your other devices.
You can install Plex Server on a number of compatible devices. From computers running Windows, Linux, or Mac, to specialised devices such as a NAS or a Raspberry Pi. The latter, though underpowered to handle multiple encoding and streaming media, is a low-cost way to build a Plex Server if you don’t want to invest in a NAS or don’t own a PC you can dedicate to that task, and is great for local playback on multiple devices.
Keep in mind what running a Plex server, or any other kind of server for that matter, entails. You need to make sure the device you’re running it from has enough storage to accommodate your media library and always stays on and connected to the internet. In order to stream your media outside your network your internet connection should also have robust upload speeds.
If you need 4K or multiple 1080p streams and transcoding on the fly for streaming outside your network, you will need a more powerful device such as a computer. However, if you don’t want to leave your computer continuously on you can use something like Wake-on-Lan to boot up your computer running Plex Server only when access is needed.
Install the Plex Media Server Application
Once you’ve picked which hardware you’re going to use, download the Plex Media Server application from the link below.
You’ll see a drop-down menu with a list of platforms you can choose from, including Windows, Mac, Linux, and a host of NAS platforms.
Note: If you are downloading Plex Media Server for the Raspberry Pi make sure to follow this guide.
Now all you need to do on your device is run through the installation wizard to install it.
It is important to note that the server needs to be running before you can access the Plex Web App in a browser.
Launching the Plex Media Server
Windows
If you chose Launch Plex Media Server at the end of the installation process, it will already be running.
If you didn’t, find it in the Start Menu and launch it. Then check the system tray again.
Mac OS X
Open the Applications folder. Find Plex Media Server & double-click it to start.
Linux
For most Linux distributions:
Open a Command prompt and type the following command:
sudo /etc/init.d/plexmediaserver startAccessing Plex Media Server
The Plex Media Server allows you to control Plex and access your media through any browser. Again, this should launch automatically and start the Setup Wizard when the server is run for the first time.
Launching the Plex Web App on Mac, Windows, Linux
Windows: Find the Plex icon in the Windows System Tray at the lower right of the screen. Right click the icon and choose Open Plex.
Mac OS X: Locate the Plex icon (>) in your Mac’s top Menu bar or right-click the Server icon in the dock and choose Open Plex.
Linux: Open a web browser. Type http://127.0.0.1:32400/web into the address bar.
Launching the Plex Web App on Network Attached Storage (NAS)
If you installed the Server on a device like a NAS, or a headless server somewhere else in the house (like a Raspberry Pi), you’ll need to know the Server’s internal IP Address. Once you know that IP address, on a PC in your home,
Open a browser window:
Type http://server.device.ip.address:32400/web into the address bar (i.e. http://192.168.1.5:32400/web).
Set Up Your Libraries
Once your server is up and running you just need to point it to your media.
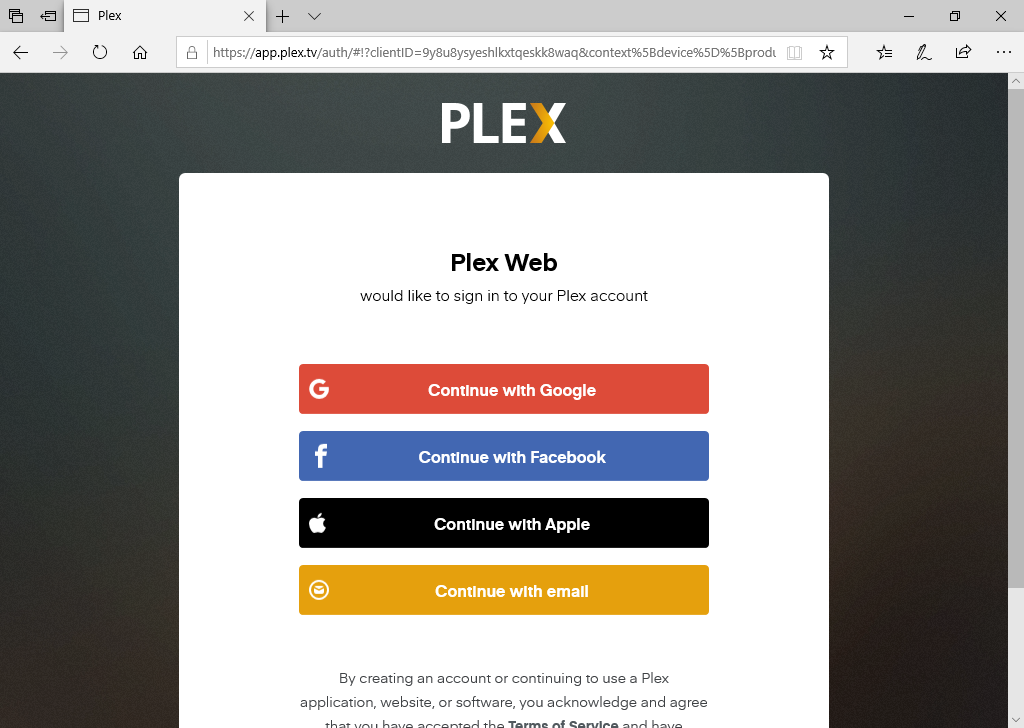
On first boot you will be greeted with a screen to set up your account. You can also choose to sign-up for Plex Pass if you wish and get additional benefits and functionality out of your Plex server.
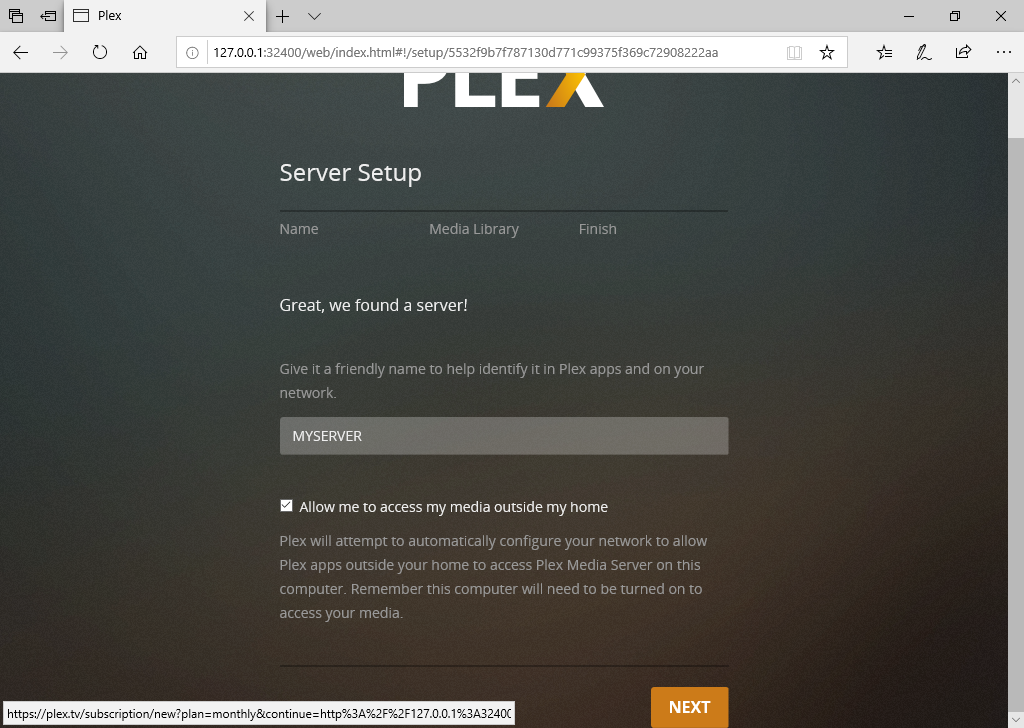
Your Plex server should be picked up automatically. You can name it however you like to make it easy to identify it on your network. After that just select “Next” and move on to add your media library.
Recommendation
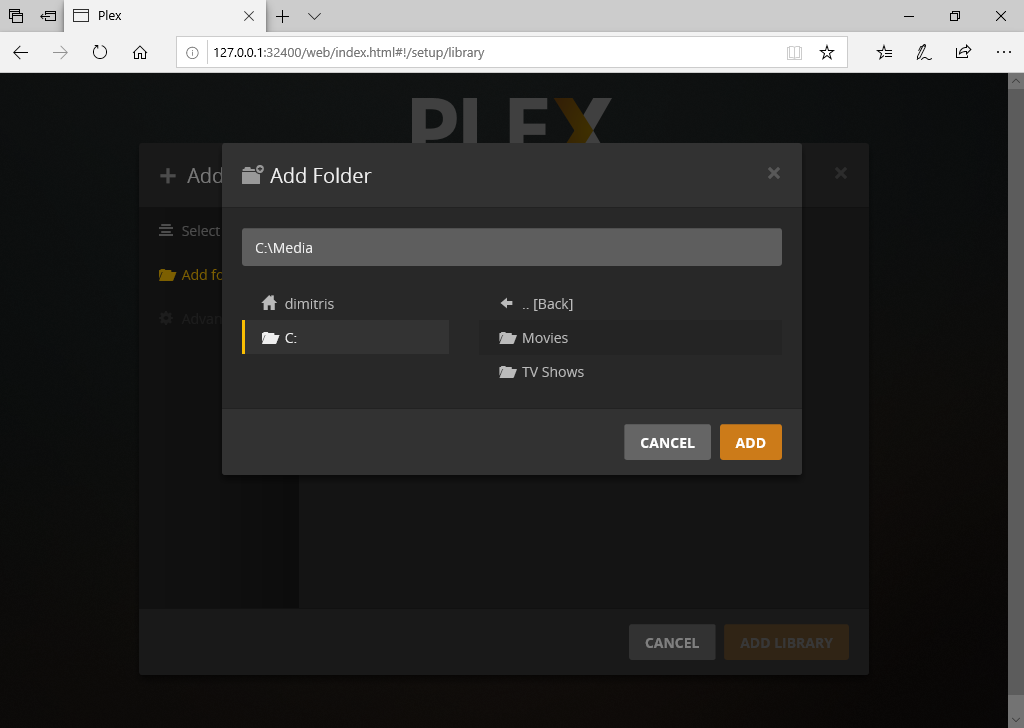
You can organise your library as you like. Best practice however to make it easier for Plex to download metadata (like cover art, synopsis, etc) is to have your media library format like this:
/Media/
/Movies/
/MovieName (Year)/
MovieName (Year).file-extension
/TV Shows/
/ShowName/
/Season #/
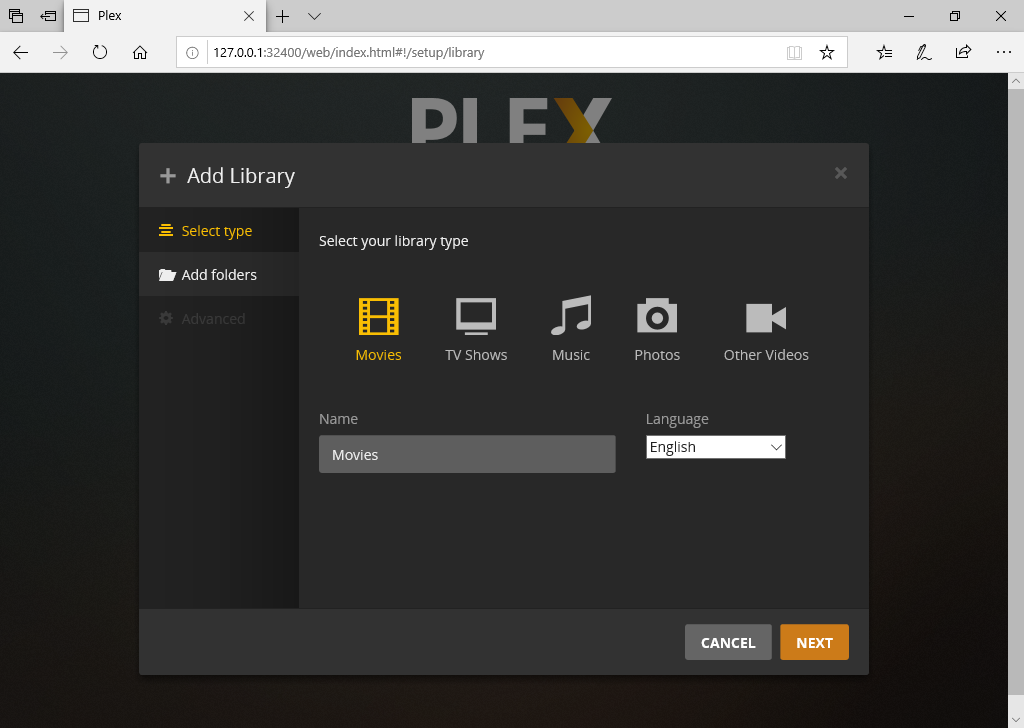
ShowName - S#E#.file-extensionFrom the menu select “Add Library” choose the type of media you wish to import and navigate to the folder hosting the media type you chose.
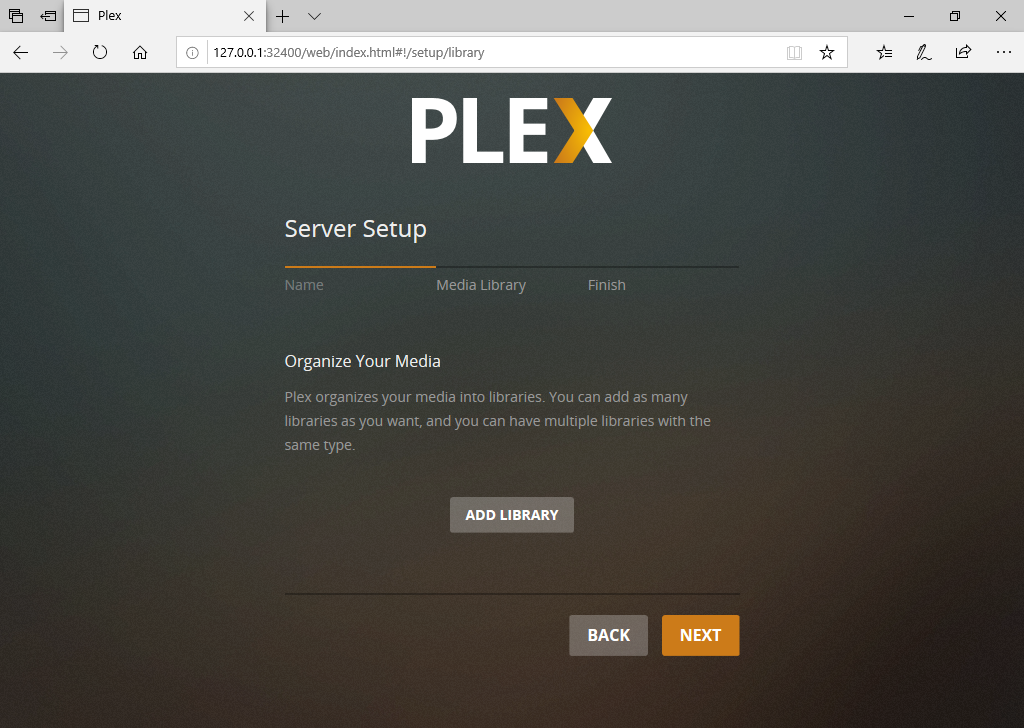
Once all your library setup is complete just make sure everything is in order and click next to finish setup.

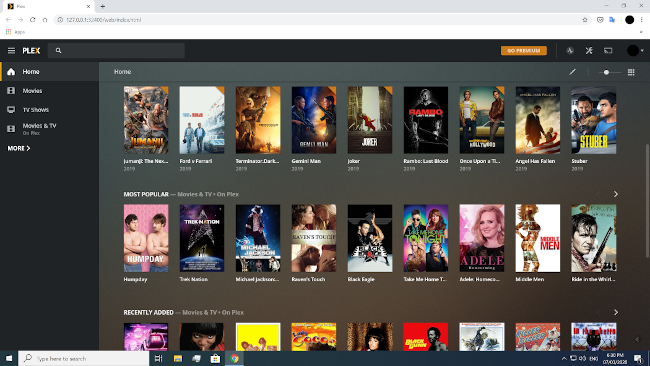
Share & Access your Plex Server
As long as you are inside your home network you can download the Plex app on your Android or iOS device ,login using the account you used to register and have access to your media.
On a PC you just point your web browser to the IP of your server:
i.e. http://server.device.ip.address:32400/web
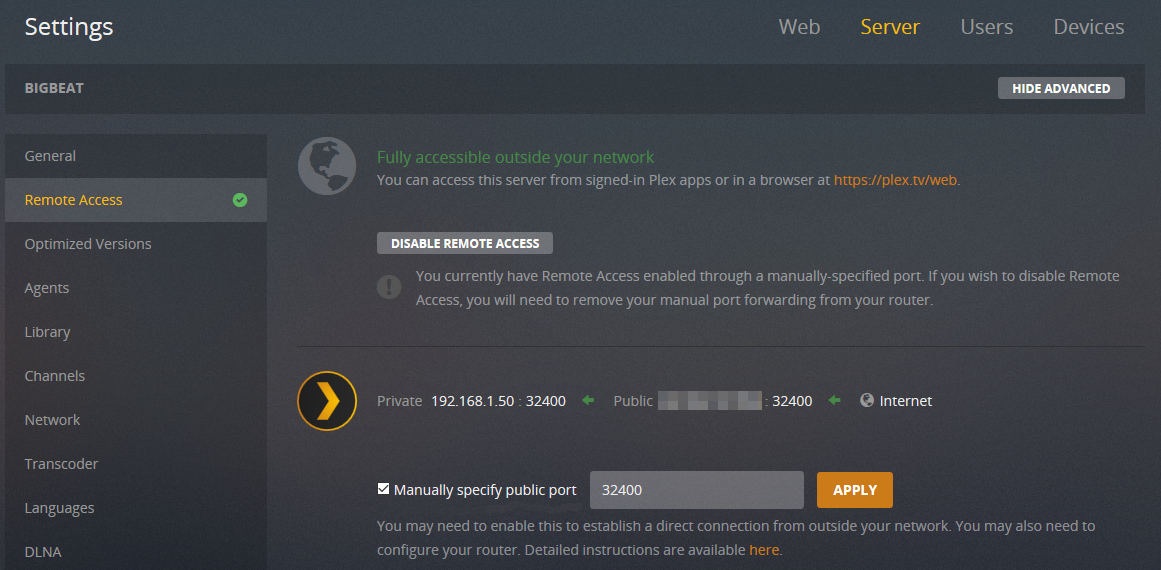
For access outside your local network you need to make sure that this is enabled. You can see the status by clicking the settings icon on the top right of the screen and selecting “Remote Access” from the menu on the left.
Note: In order for remote access to be enabled you need to open port 32400 (or any custom port you defined) on your router. For instructions on port forwarding see this post here.
If everything is set up correctly you should see a notification indicating that remote access is working properly.
You can also share your media through your Plex Server with your friends & family through settings.
Just select “Settings” from the icon on the top right of the screen and then select “Users & Sharing” from the menu on the left.
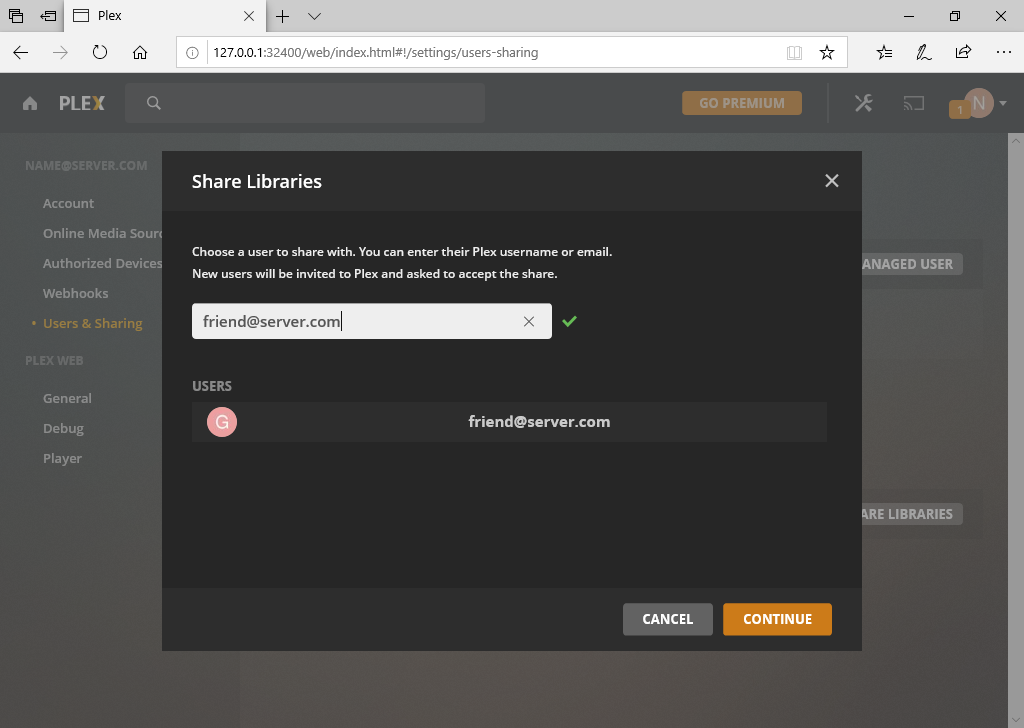
From there you just add the email address of the person you want to share your library to.
That is everything you need to know to install Plex Media Server and enjoy your media anywhere.