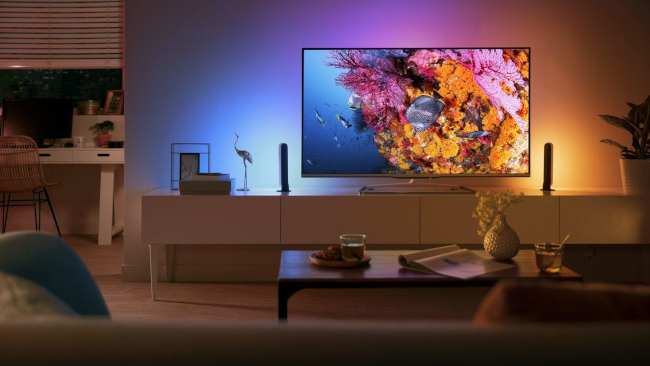
If you are familiar with the Philips lineup of TVs you will know that a distinguishable feature of the Philips brand is “Ambilight“ technology.
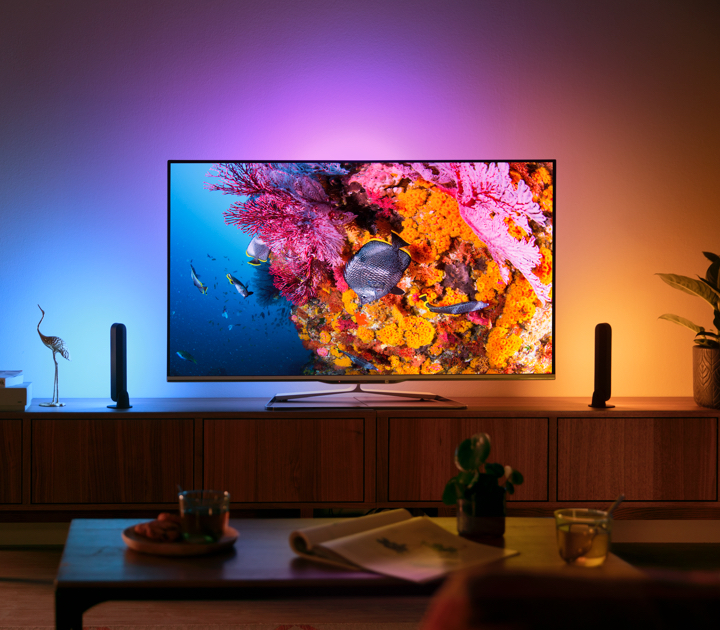
Ambilight, short for “Ambient Lighting“, creates light effects around the television that correspond to the video content, which claims a more immersive viewing experience. Ambilight is a lighting system that actively adjusts both brightness and color based upon picture content.
Don’t worry! This post is not about buying a new Philips tv.
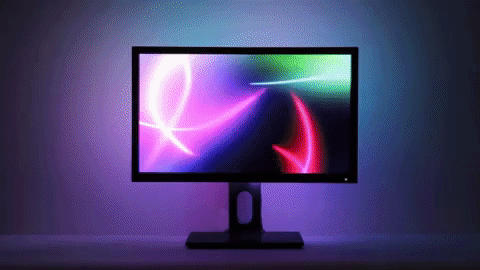
This post is about how you can make your own “Ambilight” using the Philips Hue series of lights on a budget. This will be an excellent addition to your setup if you already have a home theater PC in your living room running something like PLEX for watching your media collection.
Note: Philips offers a standalone HDMI sync box called Philips Hue Play HDMI Sync Box which you can use instead of a PC. This can then sync your hue lights to up to four devices with HDMI outputs such as game consoles, blu-ray players, etc. However this costs upwards of $200 and taking into account the cost of hue lights and the hue bridge your custom “Ambilight” setup can get very expensive very fast.
◉ What you will need
– Philips Hue Bridge (square v2 bridge as the first generation round bridge will not work for this)
– Philips Hue Lights (you can use any lights from the Hue series, i.e. strips, bulbs, standalone, etc, as long as its RGB)
– Hue Sync App
– A PC/MAC running Windows 10 or macOS Sierra (or later) connected on your TV
◉ Setup
If you already have your Philips Hue system and app set up you can skip to Step 3 below.
Step 1) First thing you need to do is figure out where to put your lights for the best effect.
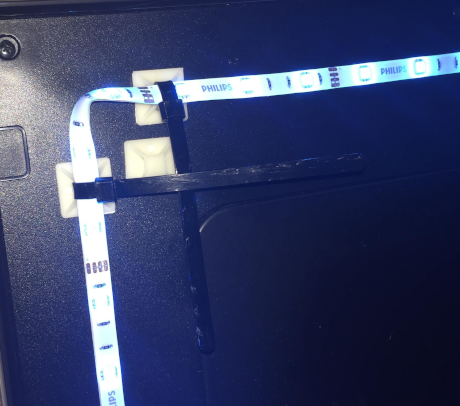
You will have the most “Ambilight” like experience if you use the Hue LED light strips. These can be placed around the back of the TV facing the rear wall.
For other types of lights I recommend setting them up as close to the TV as possible and preferably facing a wall near or behind the TV to have the light be reflected onto.
Step 2) You need to install the hub and connect the lights.
- Download the Philips Hue mobile app on your phone. It’s available for both Android and iOS.
- Plug the Hue Bridge into a power socket and hook it up to your router via ethernet cable.
- Proceed once the four lights on the Bridge light up.
- Go to Settings > Hue Bridges > Add Hue Bridge in the Philips Hue app.
- Follow the setup instructions.
Once the Bridge setup is complete you can proceed to add your lights.
- Go to Settings > Light setup > Add light.
- Hit Search or manually add the serial number listed on the lights.
- Follow the setup instructions, from which point you can name your lights and put them into Rooms.
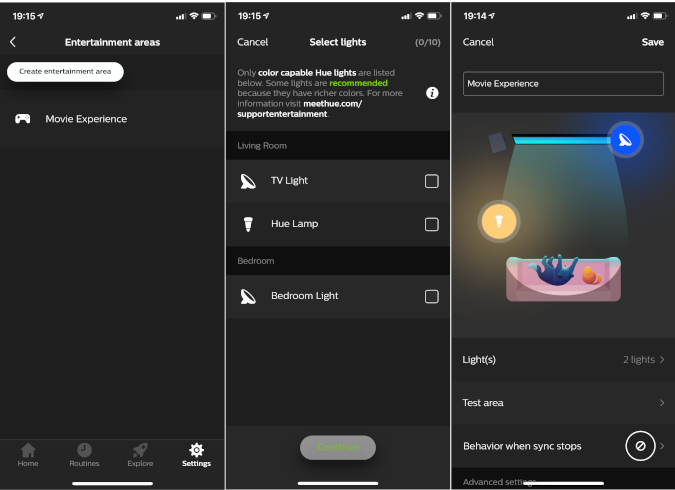
Step 3) Once your lights are connected and are up and working through the mobile app you just need one more step before you can install the Hue Sync app on your computer. That is to set up something called “Entertainment Areas”.
In the mobile app, head to the Settings tab, then tap “Entertainment areas”. Pick “Create area”, then select the rooms with the lights you want to use — you’ll only be able to select ones with multicoloured bulbs installed in them. You can then pick individual lights, if needed.Hit the “Lights are ready” button when asked to, and the app shows you a typical home cinema setup with a big TV screen and a sofa. Drag the icons on the app screen to match the physical location of your lights.
Step 4) You then need to install the Hue Sync app on your computer. In order for the Philips Hue Sync app to work it needs to be running on the same device that you’re watching movies on – in other words, a computer with macOS Sierra (or later) or Windows 10 installed.
You can download the app from the link below:
Click through the usual setup screens that you get with most apps ( the default settings should be fine), and once the program interface appears, you have the choice of setting up your Hue lights from scratch or connecting to an existing system.
Choose “Search for bridge”, then “Connect”, and then go and push the connect button on the top of the Hue Bridge itself when prompted. The program should automatically pick up the entertainment area we configured earlier, so select it.
You’ll then get to the main control panel, where you can choose between four modes: Scenes, Games, Audio and Video. This post is about creating an immersive experience for your movies so we will choose the Video mode but all the modes function very similarly should you wish to try them.
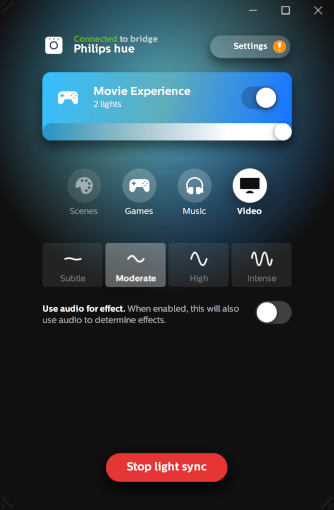
The buttons below tweak the strength of the syncing effect. Your choices are Subtle, Moderate, High and Intense, and the toggle switch underneath lets you set the lights to follow the cues from the movie’s audio too.
With that done, click Start light sync, and get whatever movie or TV show you want up on screen.
The Hue Sync app works with every video app (i.e. VLC, Media Player), or through your browser for sites like YouTube, Netflix, etc. For the best results, put the video player in full-screen mode.
You now have your very own “Ambilight” setup and you can sit back and enjoy your movies!