Let’s face it. Windows computers do not age like Apple hardware. While you should be happy if your Windows computer lasts you more than 3 years, Apple computers age like fine wine. You could be rocking a MacBook Pro, as I do, 7 years later and still feel like a very capable device.
However, that does not mean that there is nothing you can’t do to help your aging Apple computer squeeze out some more performance.
One such thing is updating the internal SSD to an NVME drive.
This has a dual advantage:
a) faster storage
b) bigger storage
Apple does use some of the fastest available storage in its computers. But as all things computer related, technology advances. So fast storage from 5 years ago can’t compete with what you can get today even in the budget segment of the market.
Everything sounds good and simple so far. But if we know Apple, we know that they don’t like consumers messing with their hardware themselves.
So upgrading your internal storage is not as simple as opening up the laptop and switching out the SSD as you would on any other laptop (provided such an upgrade is possible and the storage is not soldered onto the motherboard).
No! Apple makes things super complicated to make sure consumers pay the premium for an Apple branded upgrade.
The good news is that we can work around these issues and upgrade our MacBook storage quite cheaper than going down the official upgrade route.
I say Macbook because this guide only works on Apple laptops.
Note: You could buy authentic used Apple SSDs to upgrade your laptop but these are usually super expensive and not certain to work as Apple prohibits the sale of used Apple parts and these are grey market products.
WHAT MACBOOKS ARE SUPPORTED?
Specifically, you can use this guide to upgrade the following laptop models:
1. MacBook Air
Up to 4TB NVMe SSDs are supported (requires BootRom at least MBA61.0103.B00).
DOES NOT support natively hibernation on an NVMe SSD.
- MacBook Air 11″ Mid 2013 (MacBookAir6,1)
- MacBook Air 13″ Mid 2013 (MacBookAir6,2)
- MacBook Air 11″ early 2014 (MacBookAir6,1)
- MacBook Air 13″ early 2014 (MacBookAir6,2)
Up to 4TB NVMe SSDs are supported (requires BootRom at least MBA71.0171.B00).
DOES support natively hibernation on NVMe SSD.
- MacBook Air 13″ early 2015 (MacBookAir 7,1)
- MacBook Air 13″ 2017 (MacBookAir 7,2)
2. MacBook Pro retina 13″ & 15″
Up to 4TB NVMe SSDs are supported (requires BootRom at least MBP111.0142.B00 for the 13″ or MBP112.0142.B00 for the 15″).
DOES NOT support natively hibernation on an NVMe SSD.
- MacBook Pro Retina 13″ late 2013 (MacBookPro 11,1)
- MacBook Pro Retina 15″ late 2013 (MacBookPro 11,2 & 11,3)
- MacBook Pro Retina 13″ mid 2014 (MacBookPro 11,1)
- MacBook Pro Retina 15″ mid 2014 (MacBookPro 11,2 & 11,3)
Up to 4TB NVMe SSDs are supported (requires BootRom at least MBP121.0171.B00 for the 13″ or MBP114.0177.B00 for the 15″).
DOES support natively hibernation on NVMe SSD.
- MacBook Pro Retina 13″ early 2015 (MacBookPro 12,1)
- MacBook Pro Retina 15″ mid 2015 (MacBookPro 11,4 & 11,5)
WHAT YOU WILL NEED
This guide requires you to open your Macbook to get access to its internal hardware. While not difficult if it’s something you are not comfortable doing you could ask for assistance from someone who has done this before.
You can find an excellent guide on how to remove the back panel of the laptop and replace the SSD drive here. Follow the instructions closely.
1) To remove the back panel and SSD screws of your Macbook you will need a P5 Pentalobe and T5 Torx screwdrivers respectively.
2) Your replacement M.2 NVME SSD. While most M.2 NVME drives should work there are some that do not, due to firmware incompatibility.
Avoid the following drivers which are known to cause issues:
- Samsung PM981
- Samsung 950 Pro
- Samsung 970 Evo & Evo Plus (needs firmware update)
- SK Hynix Gold P31
3) The most important thing you will need in this guide is an adapter. Apple uses a proprietary 12+16 PCIe interface in its 2013-2017 MacBook Airs and Pro computers while the rest of the PC industry uses the “M.2” NGFF connector.
While there a lot of adapters you can find online for this sort of upgrade the general consensus is that you should buy none other than Sintech. They make the best adapters and are known to work well.
They make a short and a long adapter. I find the long adapter to be better suited for this upgrade as it offers a bit more stability to the NVME drive when inserted into the socket.
You can find both versions of the adapter in their store on Amazon using the links below:
4) You will need a bootable USB with macOS to boot your Macbook from, as we will be replacing the drive which has the Operating System installed.
You can find detailed instructions on how to do this and how to use the bootable USB after the drive is replaced directly from the Apple Support website here.
Note: This upgrade will work on macOS 10.13 (High Sierra) and later ONLY. So make sure you download a later version of macOS (Catalina or Big Sur if available is recommended) otherwise your Macbook will not recognize the replacement drive and you will be unable to complete the upgrade.
5) It is also highly recommended to create a Time Machine backup of your Macbook so you can restore all your applications and files on your new drive. Backups are a must prior to doing anything on a computer as there are a lot of things that can go wrong and will save you a lot of frustration.
OK, NOW WHAT?
So you have a supported Macbook Pro/Air model, you have downloaded and created a macOS USB boot drive, backed up your files and apps using Time Machine and you have purchased an NVME drive and Sintech adapter.
Well, now it’s time to upgrade!
The first thing you need to do is follow this iFixit guide to remove the back cover of your Macbook, disconnect the battery and replace the stock SSD drive with your replacement NVME drive using the adapter.
Make sure to keep track of the screws you remove so you know exactly where they go when you are putting everything back together. As we are using a third party adapter to install the NVME drive it is also very important to use the screw that came with the adapter as it is longer than the screw that was already in your Macbook to account for the extra thickness of the adapter.
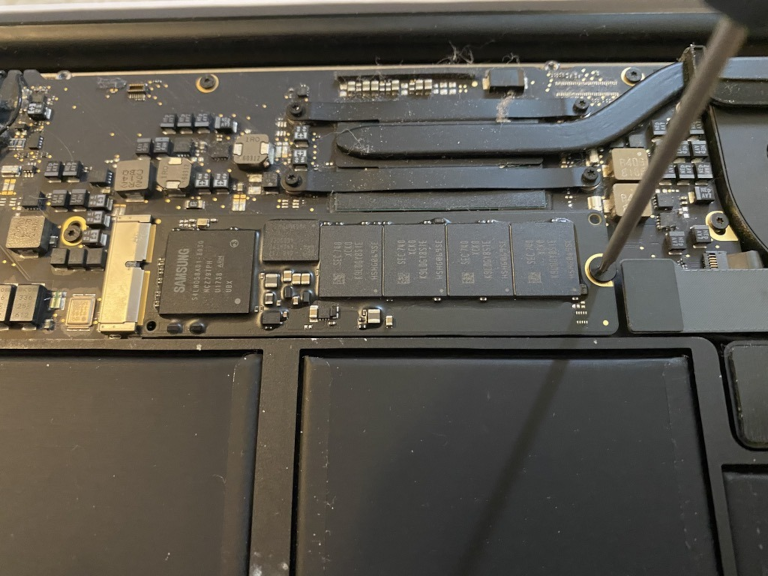
1. Remove Old Drive 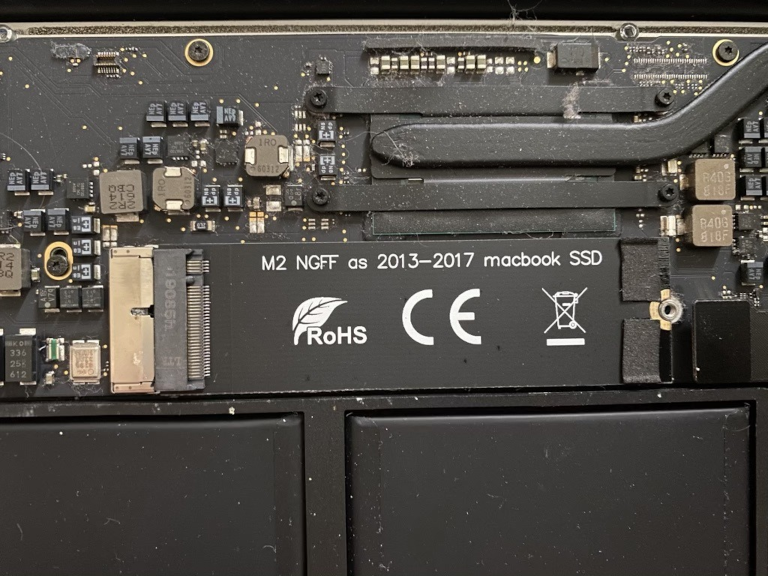
2. Install Sintech Adapter 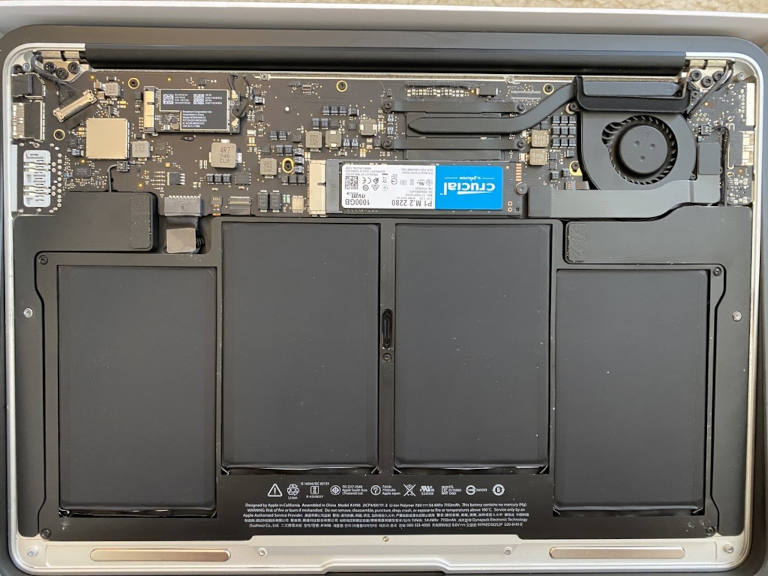
3. Install New Drive
Now that the new drive is installed is time to proceed with the configuration of the system.
Insert the boot USB you created and boot your Macbook holding down the Option key in the process. When presented with the boot options choose your USB (it should be labeled something as “Install macOS Catalina“).
The computer will boot to recovery mode.
In this screen start the Disk Utility from the Menu and choose your new drive from the pane on the left hand side. Click “Erase” and format your new drive using the APFS format option with a GUID Partition Map scheme.
After that is done you can proceed with the macOS installation. You can choose to restore your previous installation from your Time Machine backup if you want or do a fresh install. If you can, a fresh install is the best way to make sure no issues arise with the new drive.
You should now have a working macOS installation with the new bigger, faster NVME drive installed.
POST INSTALL CONFIGURATION
While the whole process of replacing the drive is relatively simple, as Apple is being Apple, there are some caveats with upgrading the official SSD drive to a third party NVME
1. On 2013 – 2014 Macbooks there may be issues with hybernation where these laptop models fail to wake up from a deep sleep state.
To prevend this problem you had two options:
- Disable hibernation or deep sleep by disabling hibernation via Terminal or
- Patch the Boot ROM or system firmware with an NVMe driver from 2015 MacBook model equivalents which do not have this issue.
The second option is complicated and is only directed to advanced users and outside the scope of this post.
Simplest thing is to is just disable hibernation all together. More so if you rarely use hibernation anyway, and just shut down your Macbook or just put it to sleep for short periods of time.
You can easily do this in the Terminal with the following command:
sudo pmset -a hibernatemode 0 standby 0 autopoweroff 0 darkwakes 0 tcpkeepalive 0Note: Thankfully, starting with macOS Big Sur 11.0.1, Apple has released a system firmware update for 2013-2014 MacBook Pro and MacBook Air models that allows these models to be upgraded with NVMe drives and prevent deep sleep issues without further system modifications. So if you have the option make your boot USB drive with macOS Big Sur.
2. Another issue you may face with this unofficial upgrade is slightly worse battery life, as the replacement NVME drive will use a bit more power. While not significant you can mitigate the issue further by choosing an NVME drive with efficient power usage. You can find more information here and here.
You can now enjoy the increased performance and storage capacity in your old Macbook on a budget!