You probably heard about VPN. Setting up a VPN is one of those things that sounds complicated, but in reality, it is not.
There are a lot of VPN services available that offer pre-configured applications that you simply install on your computer or mobile device and all you need to do is hit enable to have a VPN up and running in minutes.
If you only need a VPN to browse other countries’ Netflix or preserve your anonymity when browsing the internet, then those services are great. A simple Google search will direct you to several online services offering VPN solutions. Some of those services are offered for free but those usually limit the bandwidth available to you and are kind of slow.
Excellent paid solutions I’ve used and highly recommend are CyberGhost VPN and Private Internet Access.
However, this is not what this post is about. This post is about you setting up your own VPN service on which you have full control.
There are two ways of doing this:
- Setup a VPN on a local machine in your network. This is the method we will be discussing in this post. The benefit of this method is that you can connect to your VPN and have remote access to your home network as if you were physically there. For example, you can browse your shared files without the need to open your NAS to the whole internet. You can even use Wake-on-Lan to remotely boot up machines in your home network (something that is not possible to do over the internet otherwise).
- Setup a VPN on a remote Virtual Private Server offered by services such as Linode. This method offers the same benefits as the VPN services you find online, such as masking your actual location and ensuring your online anonymity. A cloud server provider also offers a lot more services apart from VPN such as email servers and website hosting servers. The downside is that you still must pay for the online server, and you won’t have access to your home network.
Raspberry Pi is the ideal device for setting up a VPN server as VPN needs to be online and accessible 24/7. Raspberry Pi with its super small size, low cost and low power consumption offers an excellent solution for a set and forget VPN device.
So, let’s get on with how to set up an OpenVPN Server on a Raspberry Pi.
.
Sections
1. What is a VPN?
2. Different VPN Protocols
3. Setting Up an OpenVPN Server
4. Setting Up a VPN Client
Sections 1 & 2 are here for informational purposes only and they aren’t really required for the setup. You can skip ahead if you like.
.
1. What Is a VPN?
VPN stands for Virtual Private Network.
A virtual private network (VPN) extends a private network across a public network and enables users to send and receive data across shared or public networks as if their computing devices were directly connected to the private network. Applications running on a computing device, e.g., a laptop, desktop, smartphone, across a VPN may therefore benefit from the functionality, security, and management of the private network. Encryption is a common, though not an inherent, part of a VPN connection. (Source: Wikipedia)
.
2. Different VPN Protocols
Regardless of the VPN type that you use, the communication can leverage different protocols or a combination of them. This post does not cover all of them, but the most popular ones are:
• Point–to–Point Tunneling Protocol (PPTP): PPTP has been around for the longest time, and it is supported for all the major OS’s out there. It is widely extended, but its security has been called to question in the past few years. It is very fast because it uses very basic encryption, however, it is not recommended from a security standpoint.
• L2TP/IPSec: L2TP was the result of a partnership between Cisco and Microsoft in an intent to create a more secure version of PPTP. It uses IPSec to implement end-to-end encryption during the communication.
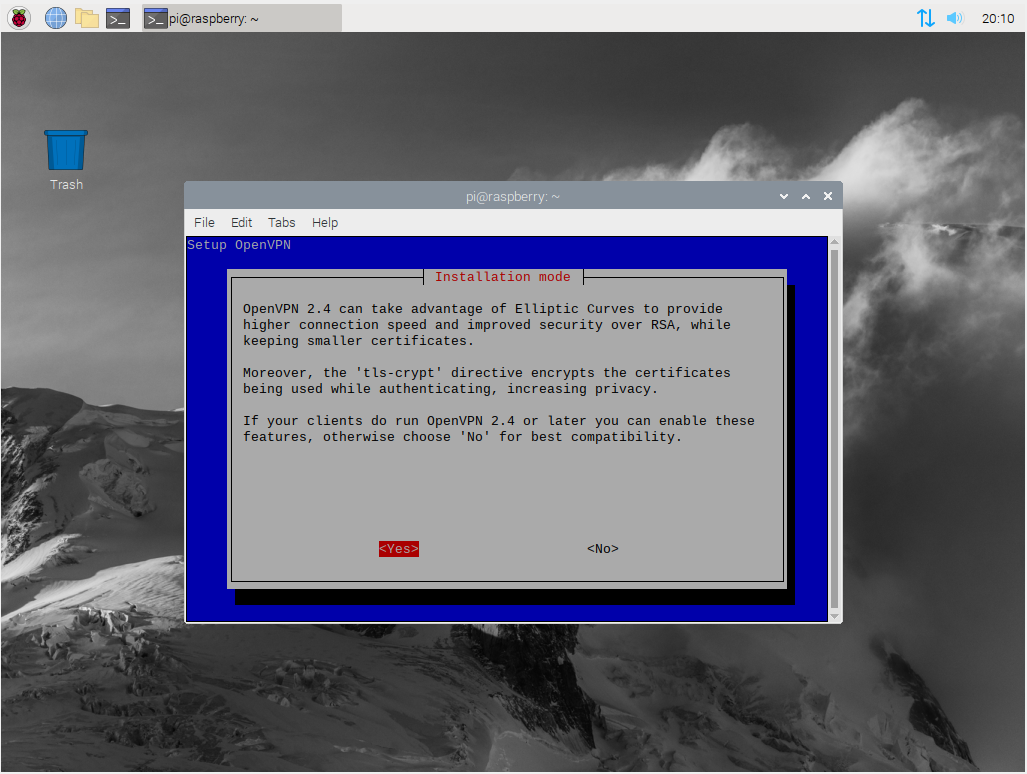
• OpenVPN is an open-source product created back in 2001 that is becoming a standard. It is based on OpenSSL and is considered one of the most secure options when it comes to VPN communication. OpenVPN is supported by all the major OS’s and is easy to implement. It is one of the best options for a domestic VPN like ours.
Our Raspberry Pi VPN will be using a Remote Access OpenVPN.
.
3. Set up an OpenVPN Server
This tutorial assumes that you already have a Raspberry Pi with a Linux distribution installed, preferably Raspbian or any of its derivatives with internet access. See this post here to get you started.
First thing you need to do is download and install the required packages on your Raspberry Pi.
Physically connect or SSH into your Raspberry Pi and run the following command:
curl -L https://install.pivpn.io | bashOnce it is downloaded, PiVPN will look for updates in the system and start installing the required packages.
If the installation process shows that there are pending updates, you should consider updating the system once the process is finished.
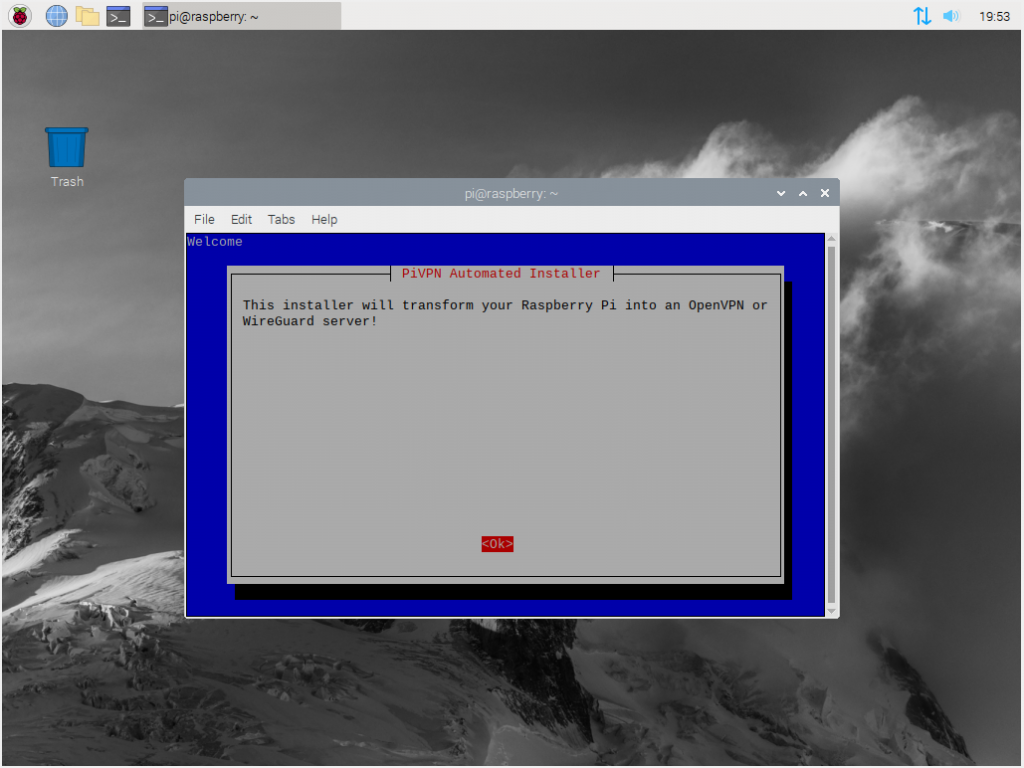
The installation process for the Raspberry Pi VPN depends on your Internet connection and version of Raspberry Pi but it should not take too long. When everything is done you will see this message on the screen. Just hit enter to begin the installation/configuration.
Assign Static IP Address
The VPN server requires a static IP to function correctly, but don’t worry if you haven’t set up one yet, PiVPN will do that for you.
You can leave the IP that is currently assigned to your Raspberry Pi or select No if you want to assign a different one.
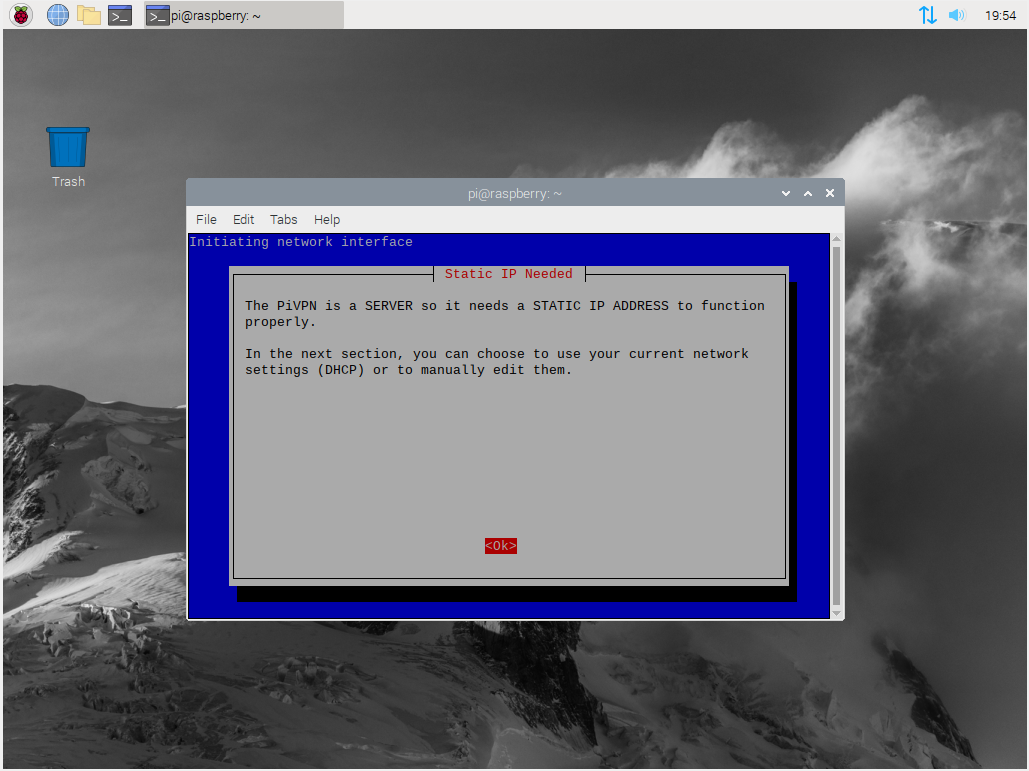
Once you have assigned an IP that you like to your Raspberry Pi, you are ready to move on to the next step.
Select Your Default Gateway
The default gateway is the device your Raspberry Pi connects to the Internet, which is your router in most cases.
The installation script should be able to find it automatically, but you may want to verify that the IP shown in the screen does indeed correspond to your router’s IP. Refer to this post If you don’t know how to find your router’s IP address.
It will usually be http://192.168.1.1 or http://192.168.0.1 One of those should take you to your router configuration page.
Verify that all the settings are correct and continue.
IMPORTANT NOTE: Your Raspberry Pi VPN device in your network cannot be in the same IP range as the remote network you are accessing from. For example, if you are at a friends house and you have connected to his wireless network with your computer and you got an IP of lets say 192.168.1.5 you may not be able to access your network over your VPN if your Raspberry Pi VPN has an IP in the same range (i.e. 192.168.1.20) in your home network since the IPs will conflict.
The solution to this is either change your home network IP range to something uncommon like 10.0.1.0 which minimises the risk of accessing from a location with the same IP range (most common IP range is 192.168.*.*) or access your VPN using the LTE/4G network.
This means accessing the internet and connecting to your VPN using your mobile’s phone internet plan by setting up a mobile hotspot.
Since the purpose of this tutorial is accessing your home network when you are out and about, setting up a mobile hotspot for internet access is the simplest way of accessing your VPN and ensuring there are no issues.
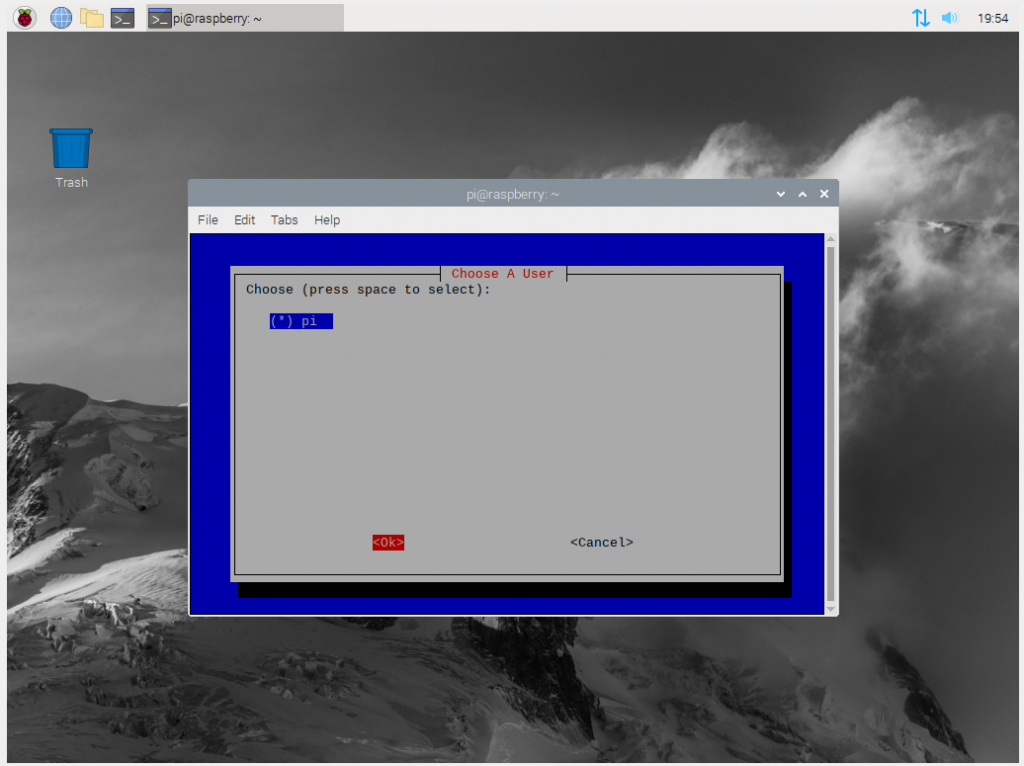
Raspberry Pi comes pre-configured with a default user named “pi”. That’s the user we will use for this installation. So accept the default option and continue.
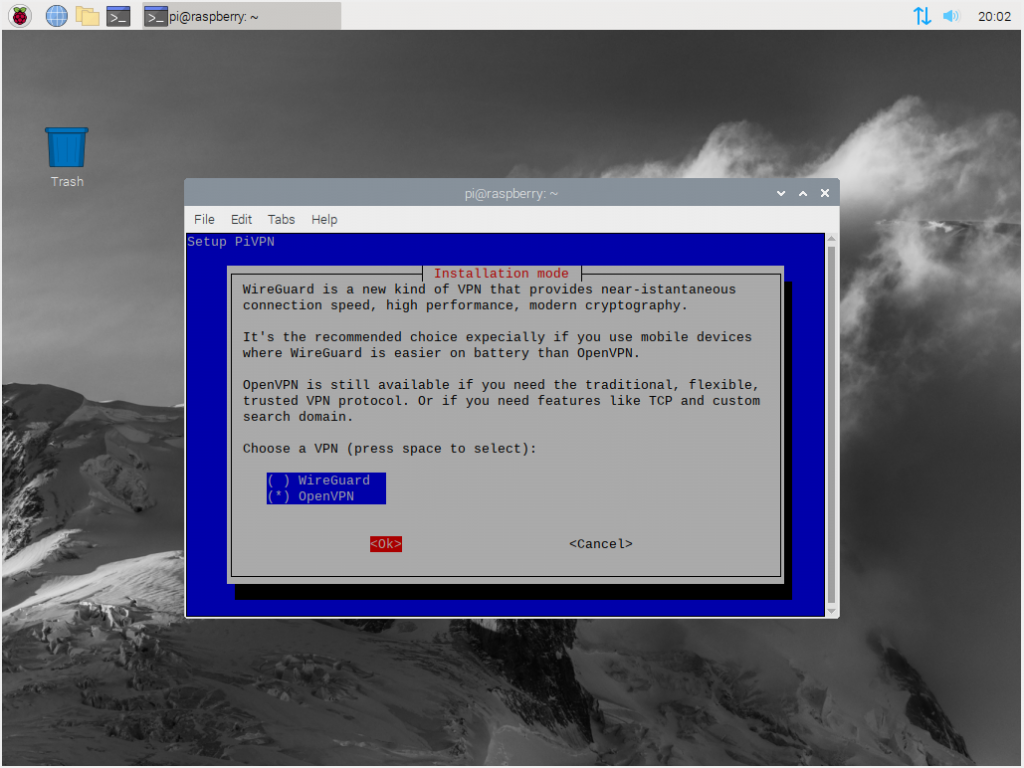
We will use OpenVPN in this tutorial. Use the arrow keys to select and the spacebar to mark your selection and click continue.
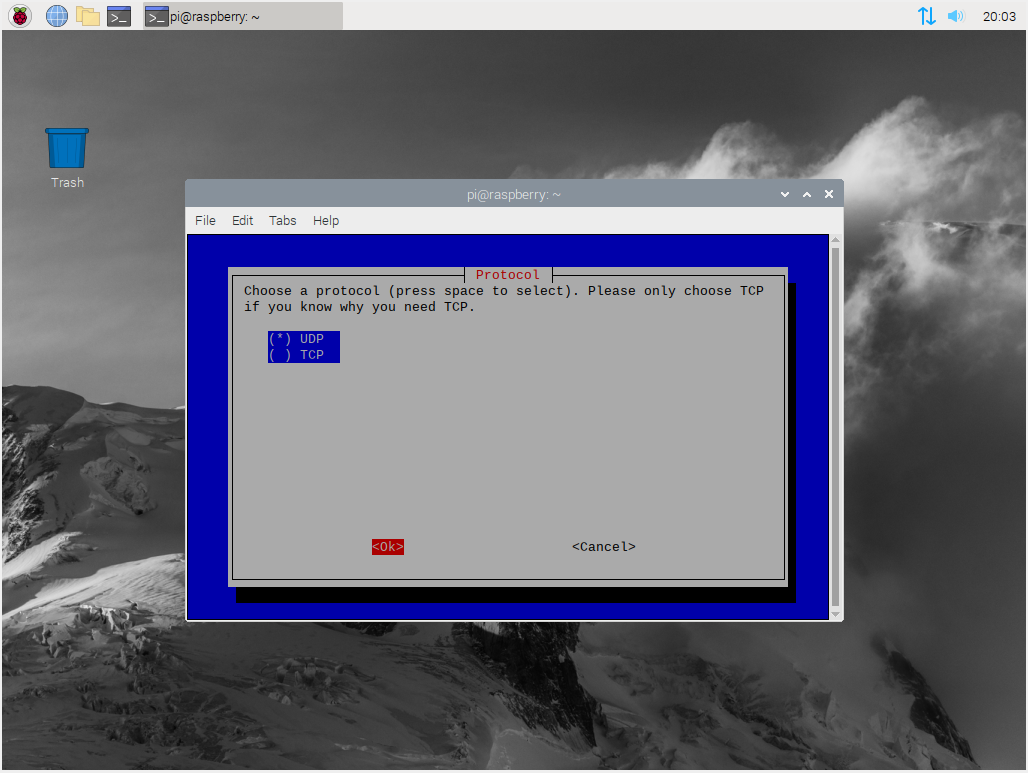
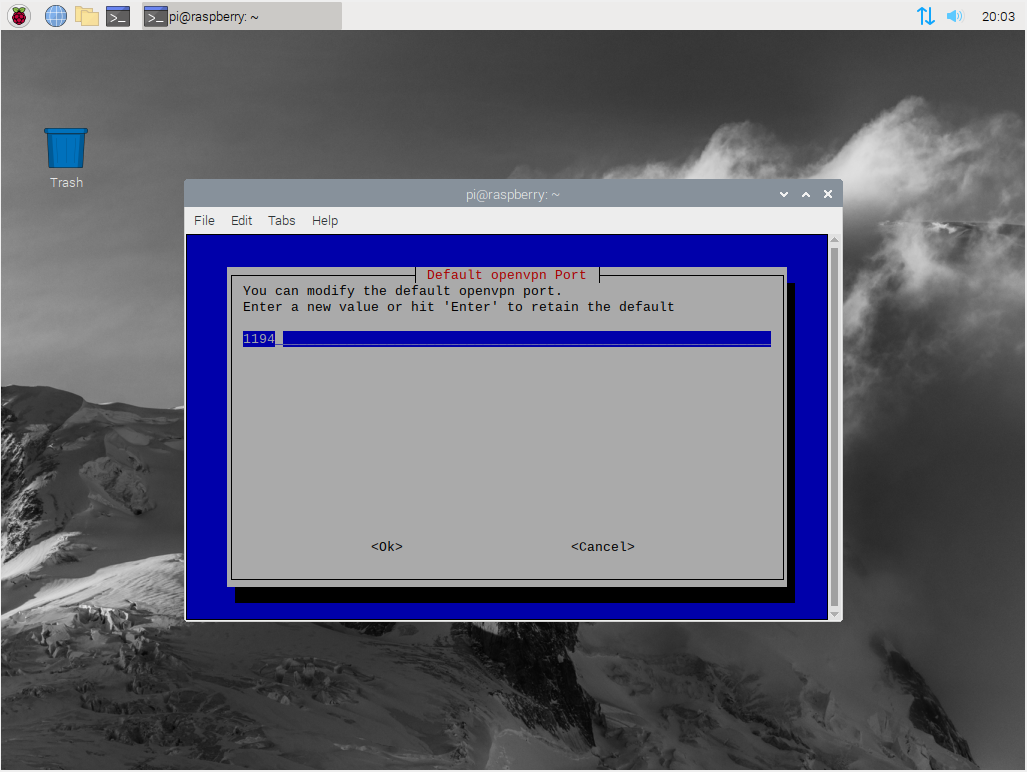
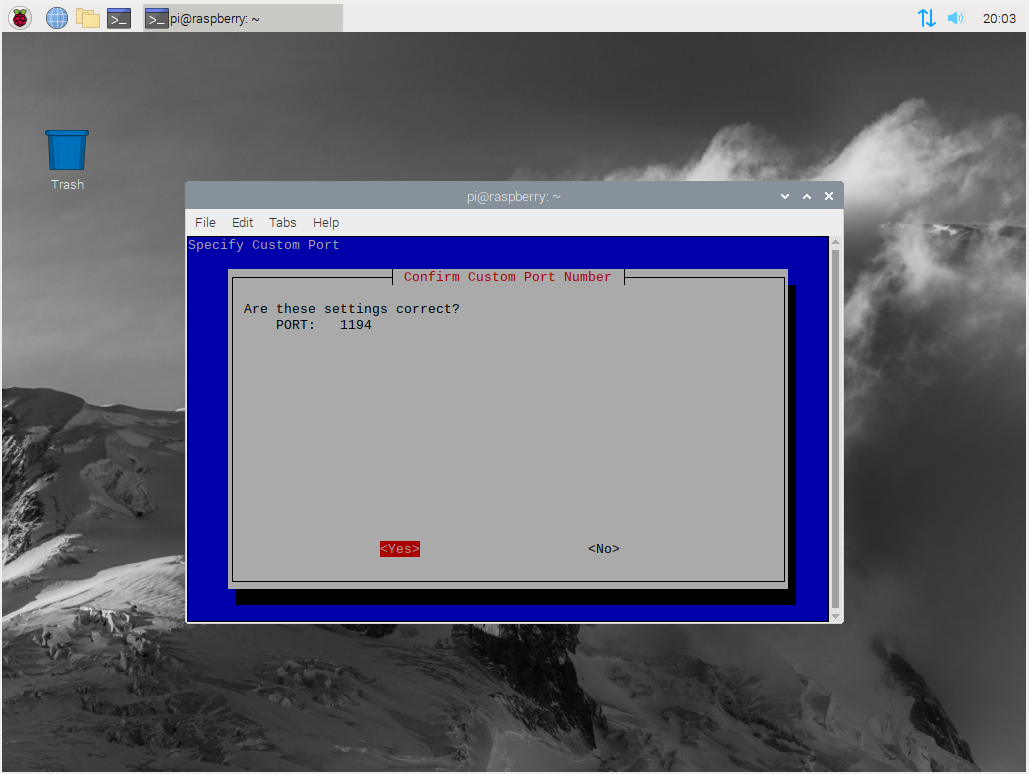
In the next steps accept the default UDP port (1194) and confirm your choices.
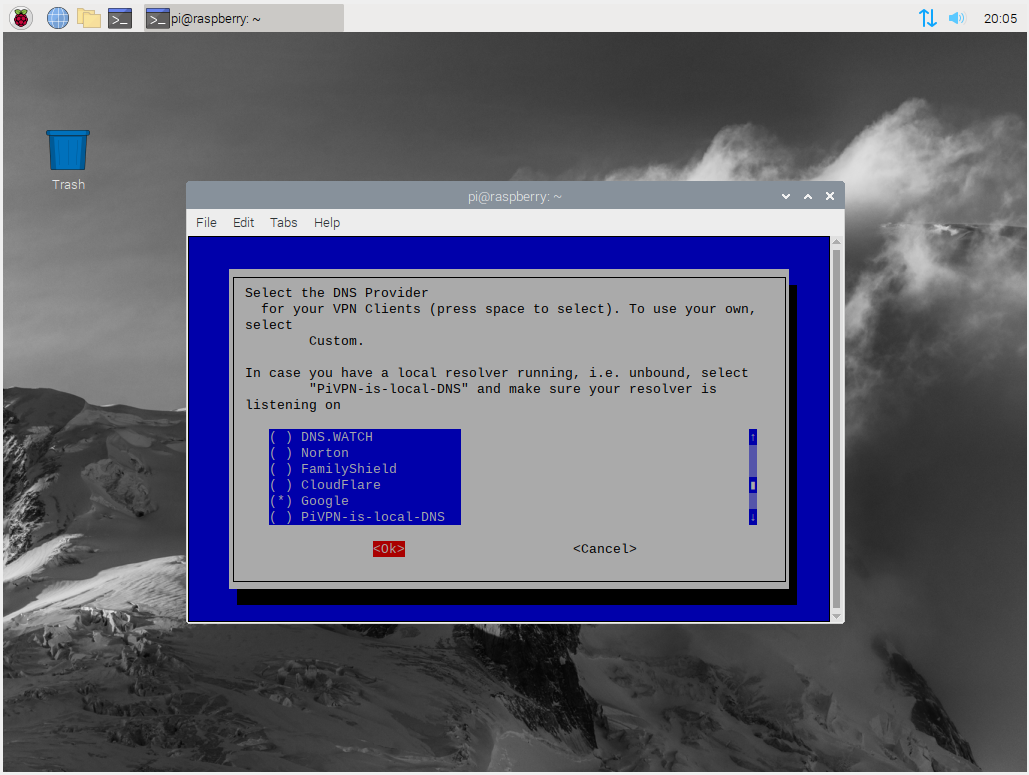
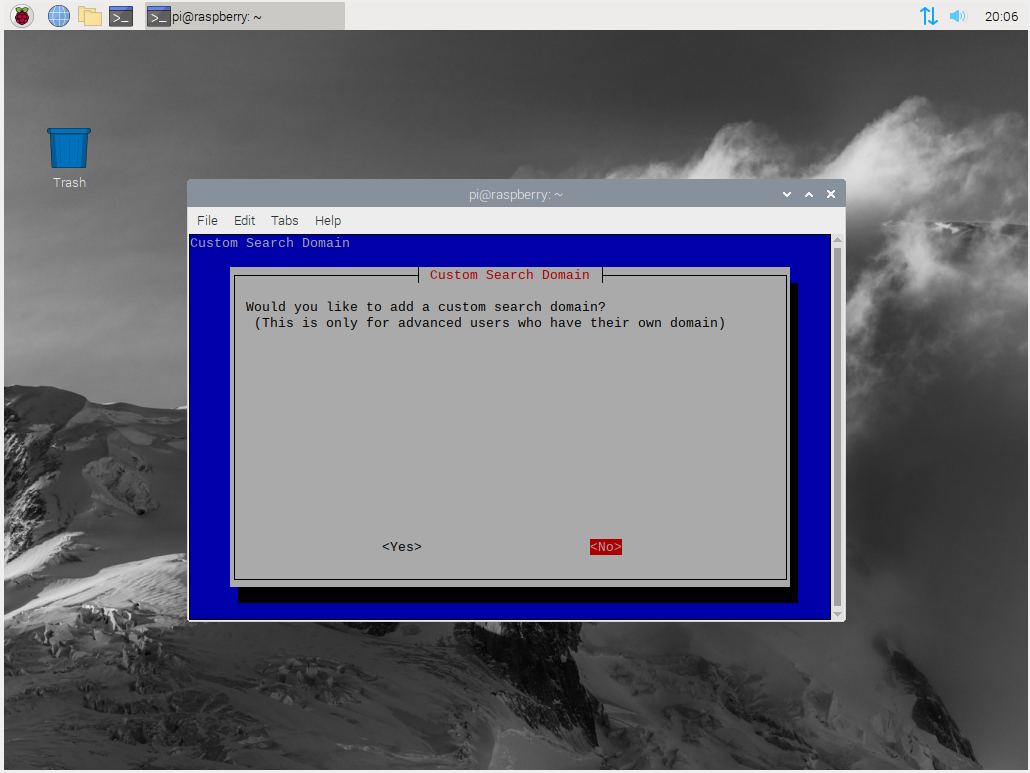
For DNS providers Google is a good option. No need to add a custom search domain.
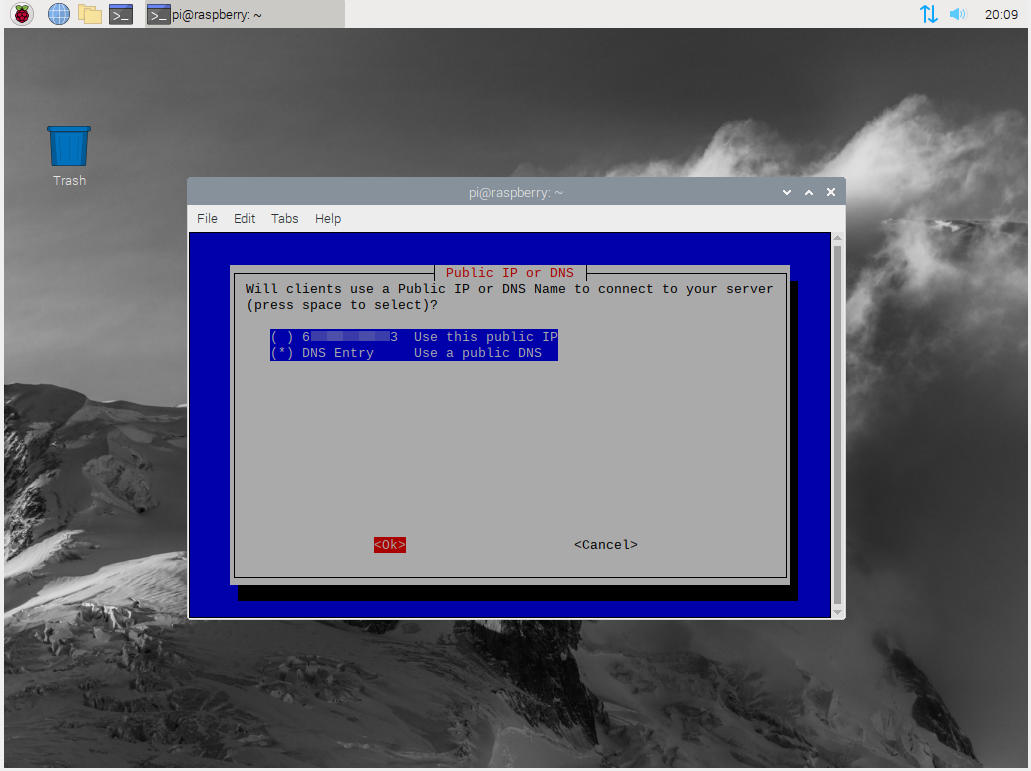
PUBLIC IP or DNS
This is a very important section in the installation process. You can choose to remain with the default option of your Public IP. However if you are a home user chances are your ISP (Internet Service Provider) has you on a dynamic IP. This means it changes from time to time without you knowing. This will render your VPN inaccessible if you don’t know the new IP assigned to your account.
An easy and free way to solve this is use a DDNS provider such as NoIP.
You can then select the DNS option and enter your registered DDNS name in the next screen.

DDNS Provider 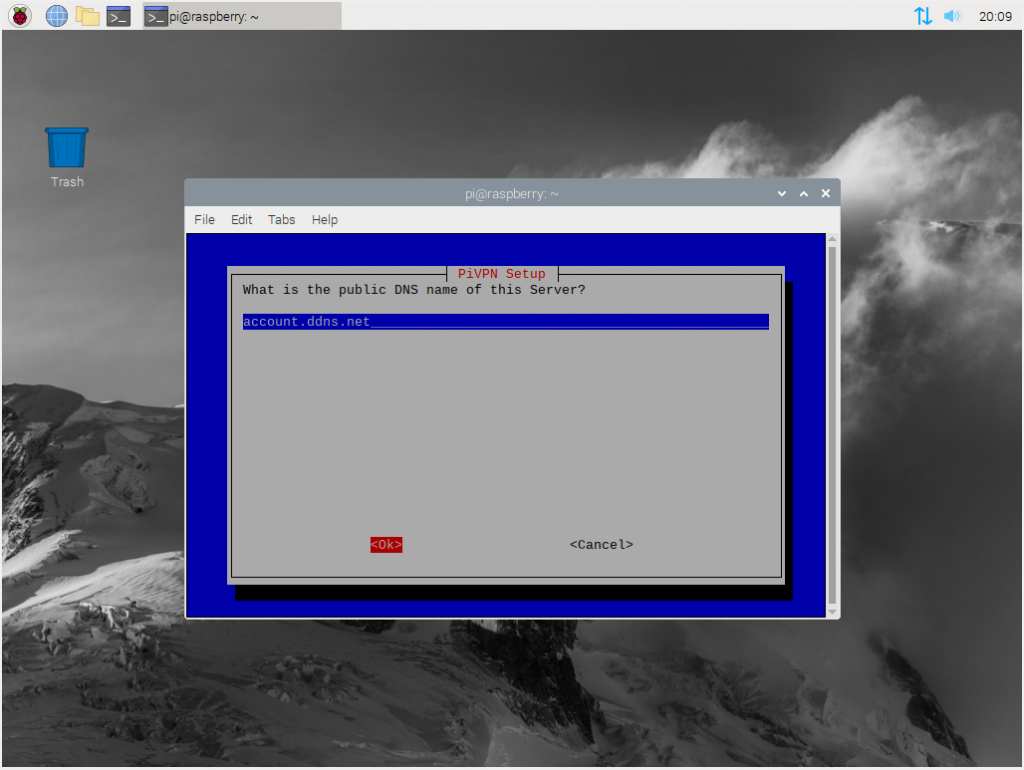
Sample DDNS Account
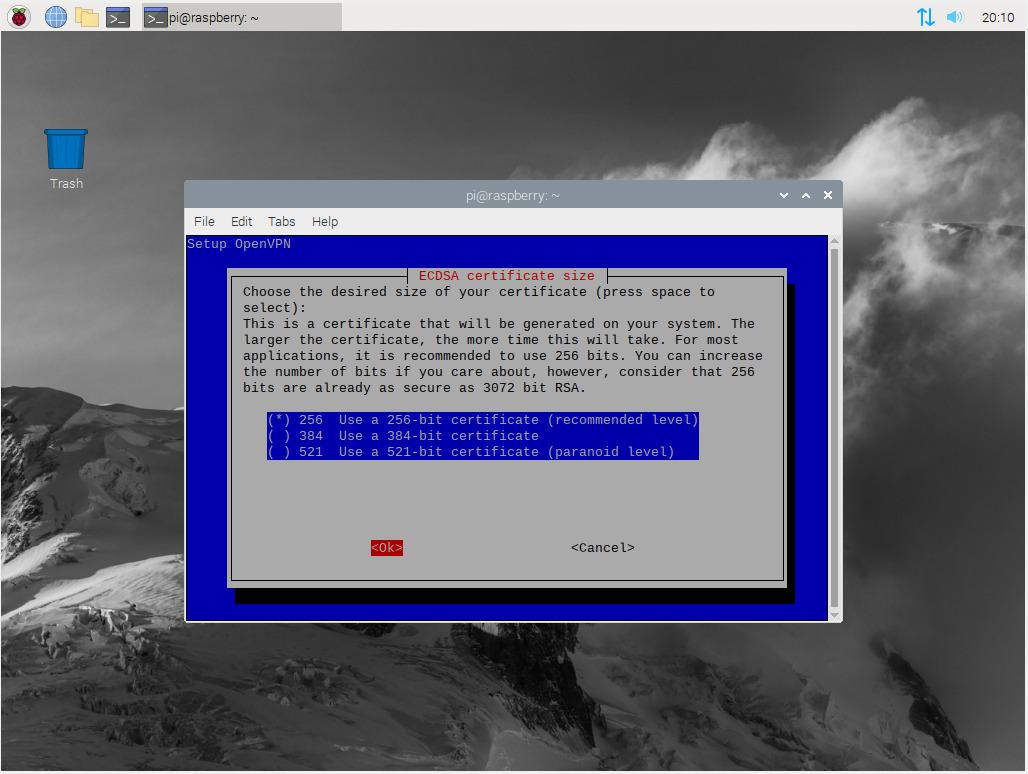
Choose the default option for encryption (you can select higher encryption if you like but 256 is more than enough) and click OK to generate the encryption key.
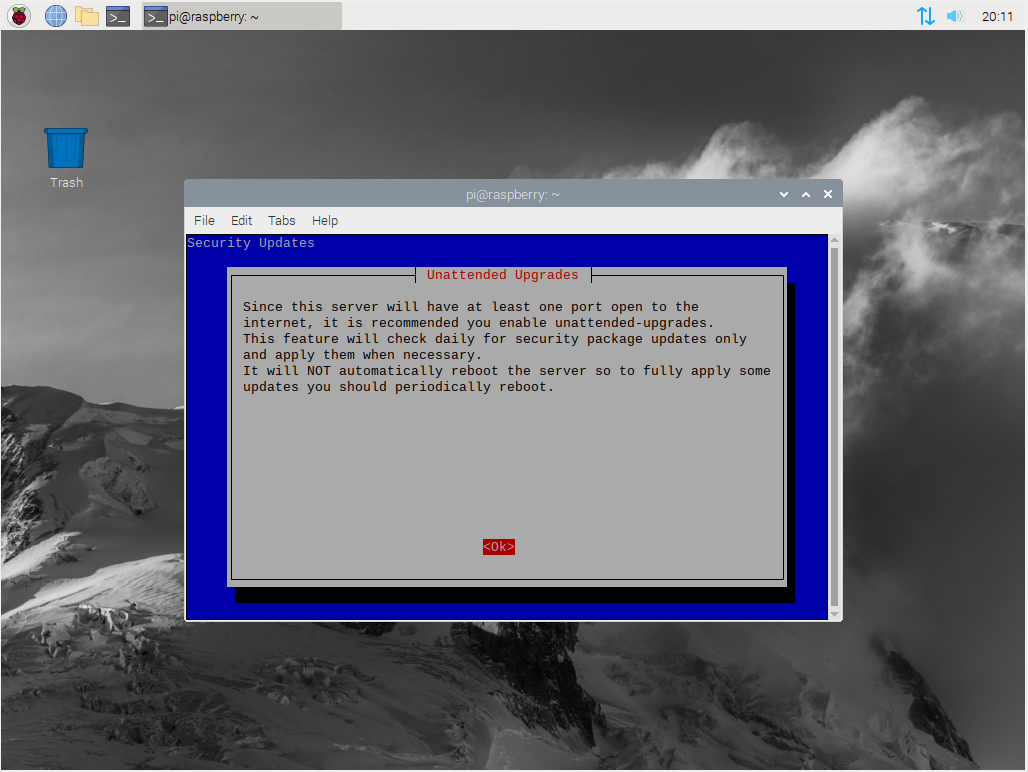
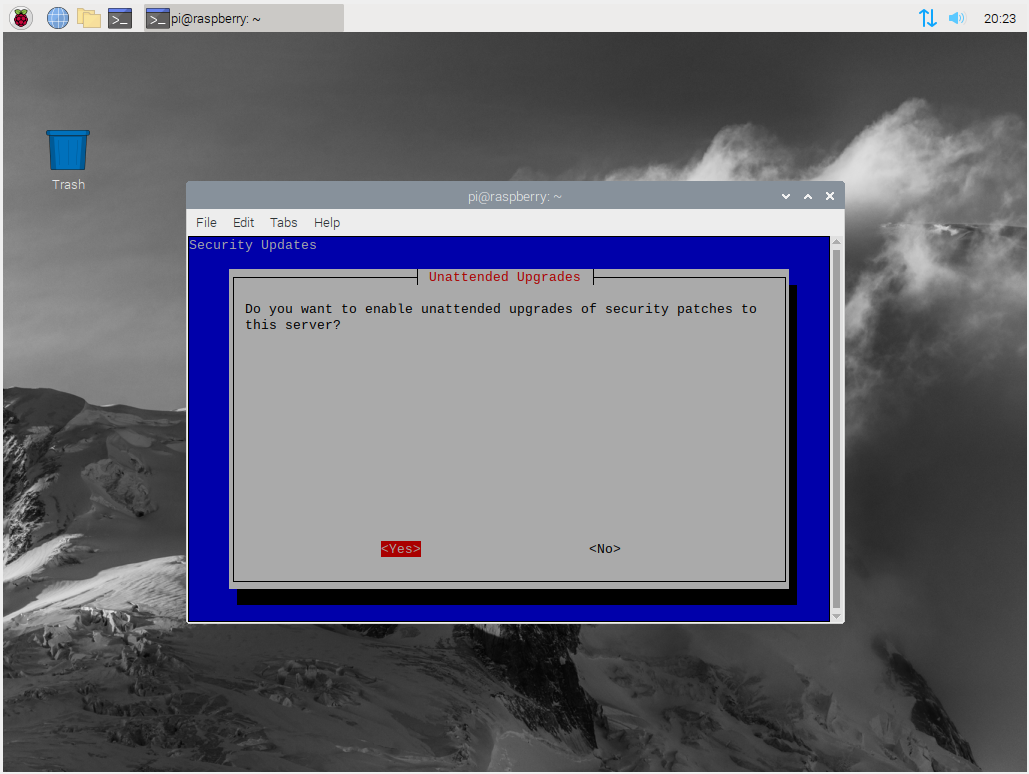
It is good practise to enable unattended updates since this is a server open to the internet and updates provide critical security patches to the software.
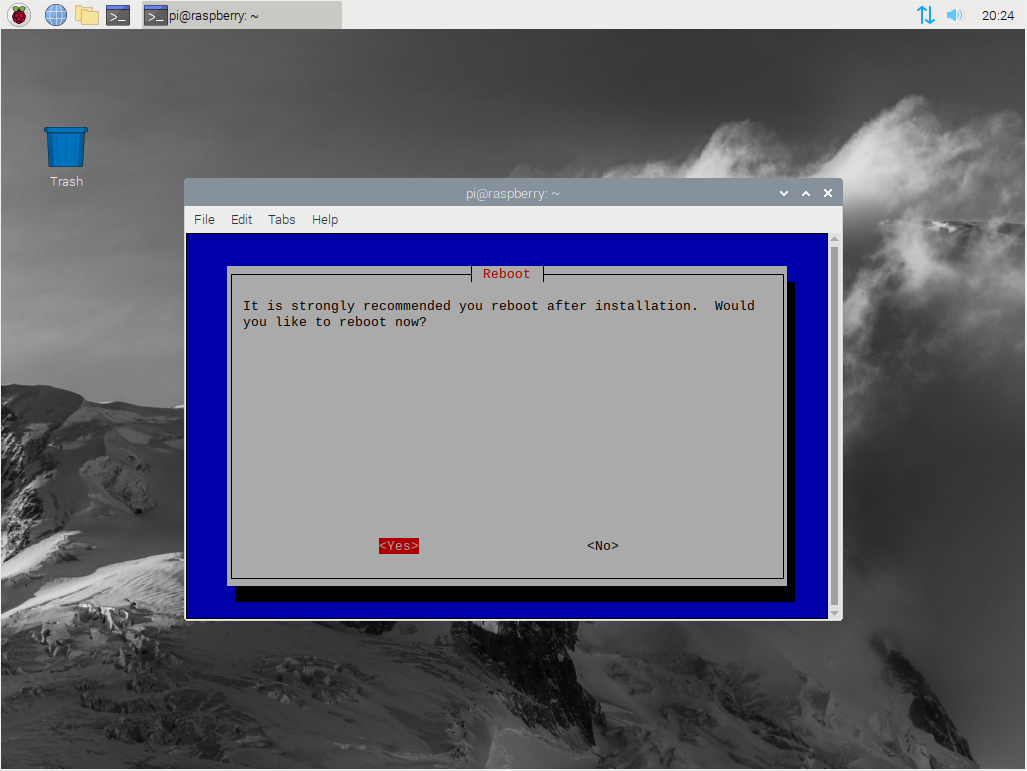
The installation of OpenVPN is now complete. We are almost done. You just need to restart your Raspberry Pi and follow the last step after it reboots.
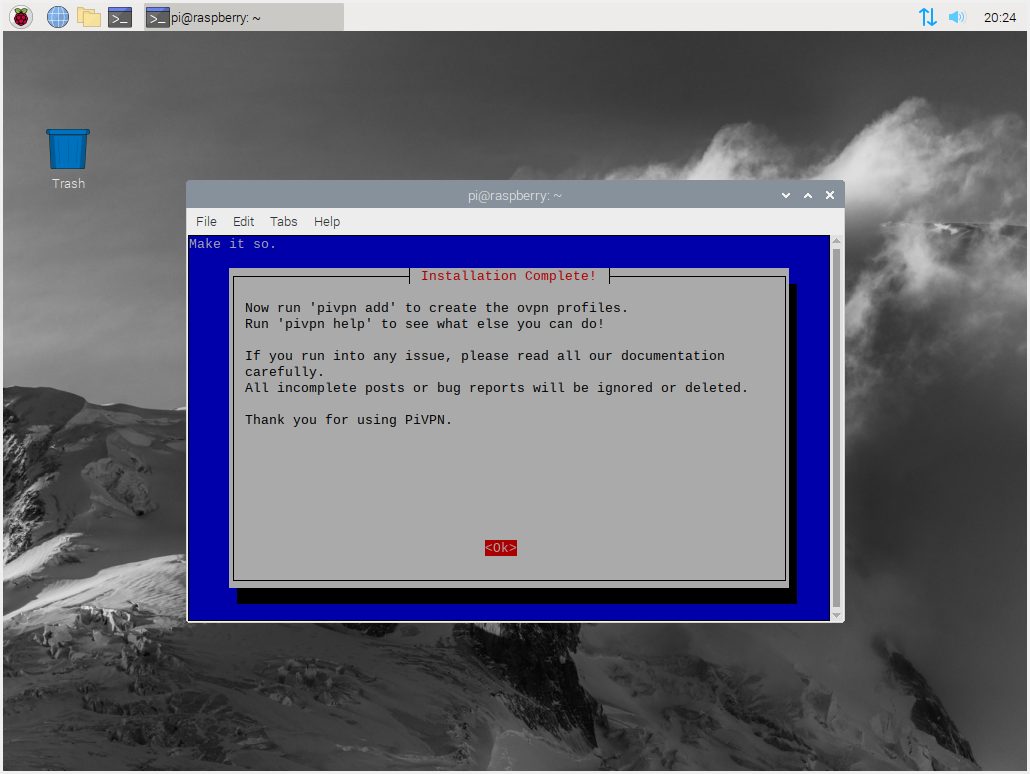
When the Raspberry Pi boots up again open a terminal and run the following command:
pivpv add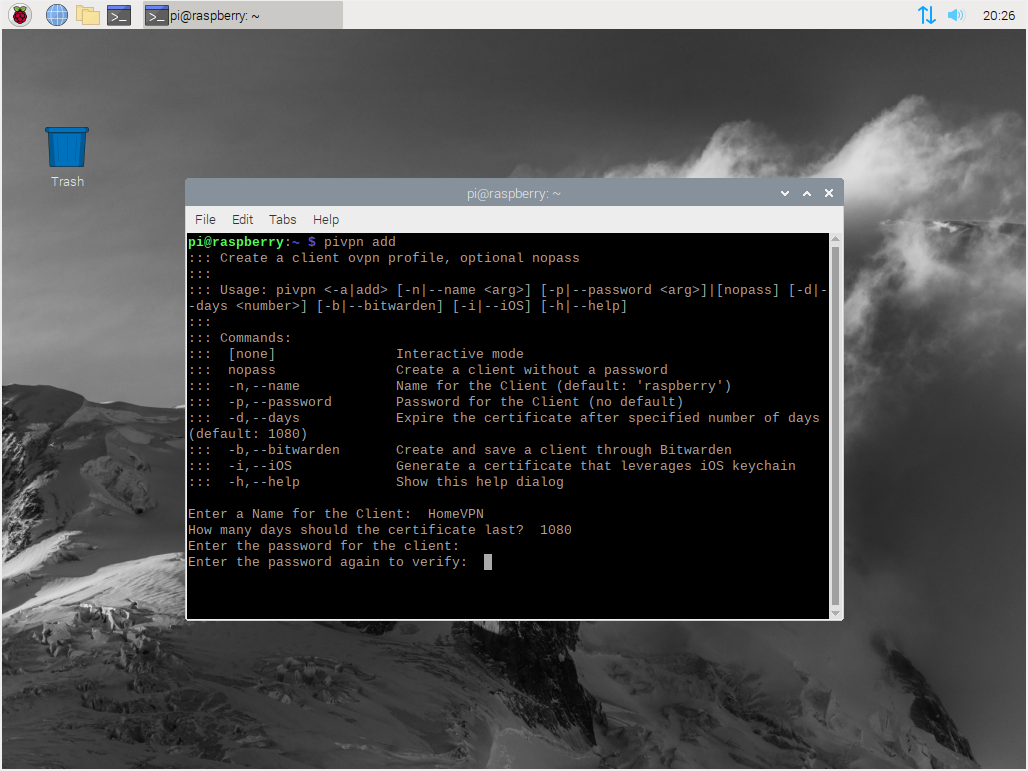
Select any name you want for your VPN (i.e. HomeVPN), accept the default certificate duration and enter a memorable yet secure password for accessing your VPN.
We are now done with the VPN configuration.
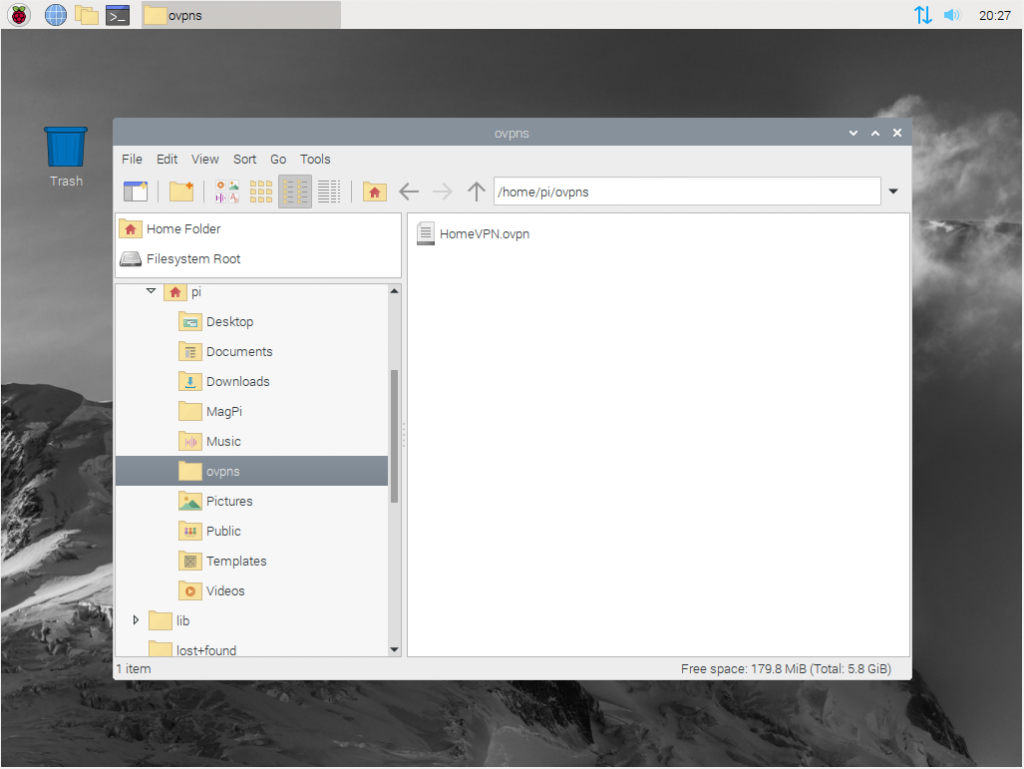
In your home folder of your Raspberry Pi you should now see a “ovpns” folder with *.ovpn file. That is the file we will use to set up the client side on another machine for accessing the VPN.
Make sure that you don’t delete this file and this file is kept backed up and secure.
Now it’s a good time to copy the *.ovpn file generated to a USB drive since we will need it to set up a VPN client on another device.
.
4. Connecting to the VPN Server
In order to connect to the VPN server, you will need an OpenVPN client installed on your laptop (your laptop since the whole point of a VPN is able to access it while you are outside your network).
For Windows you can download the client from the link below:
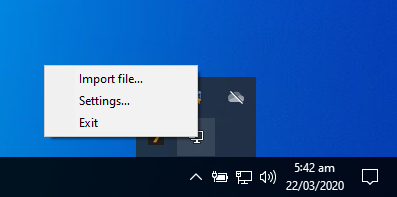
Once installed just find the application shortcut on your Desktop and click on it to start. Ignore the popup about the missing configuration file. You should now see an icon in your notification tray in the bottom left of the screen which looks like a computer with a little lock. Right click on it and select “import”. Find the *.ovpn file you transferred from your Raspberry Pi and select it.

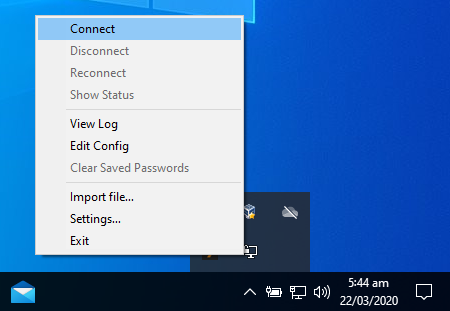
Now the next time you are outside your network and you need to connect to your VPN you just right click on the icon select “Connect” enter the password you specified during the OpenVPN setup and you should be good to go.
Linux Users on Gnome can use the built- in VPN client in Network Manager. The process is similar to windows. Just setup a new VPN and import your *.ovpn file. Then click connect and enter the OpenVPN password (if username is required then this should be “pi”).
.
TROUBLESHOOT
If you have trouble connecting to your VPN make sure your device’s IP is not in the same range as the IP of your Raspberry Pi VPN as noted above.
If you can connect to your VPN but you have no internet access then disconnect from your VPN.
On your Raspberry Pi (you can connect through SSH if you don’t have it connected to a monitor and keyboard) run the following commands:
sudo /sbin/iptables -P FORWARD ACCEPT
sudo /sbin/iptables --table nat -A POSTROUTING -o eth0 -j MASQUERADE
Note: Replace eth0 with wlan0 in the command above if you are using the wireless adapter and not ethernet to connect your Raspberry Pi to your network.
If this solved your problem make sure to run these commands every time you reboot your Raspberry Pi.