
One of the benefits of having a NAS or a Raspberry Pi acting as a server is that, unlike a computer, it can run 24/7 with minimum or no noise and use very little power.
What do you do then, if you are on a budget and say you already installed Plex Media Server on your computer to manage your media collection? Do you have to leave the computer running in the background all the time?
Well, the answer is you don’t! What you need is Wake on LAN (WoL).
What is Wake-on-LAN?
Wake-on-LAN (WoL) is an Ethernet or token ring computer networking standard that allows a computer to be turned on by a network message.
How does it work?
Wake-on-LAN relies on “magic packets”. After enabling Wake-on-LAN, your computer will detect this package containing its MAC address, sent from another device such as a smartphone, and turn itself on.
What are the requirements?
In order for WoL to work, your computer must have the following requirements:
- Ethernet connection. Your computer must be physically connected to your router using an Ethernet cable.
- The device sending the “magic packet” must be connected in the same network as the computer that is being woken.
Advanced Users: WoL does not work outside your home network unless you have some business grade router (chances are if you are reading this post, you don’t). You can however bypass this limitation by setting up a Raspberry Pi as a VPN and connecting to your home network when you are away. From there you can simply run this script and WoL should work.
Step 1: Enable Wake-on-LAN on Windows 10
Right-click Start and click Device Manager from the context menu. This opens the Device Manager. Here you can find all the hardware devices your PC has.
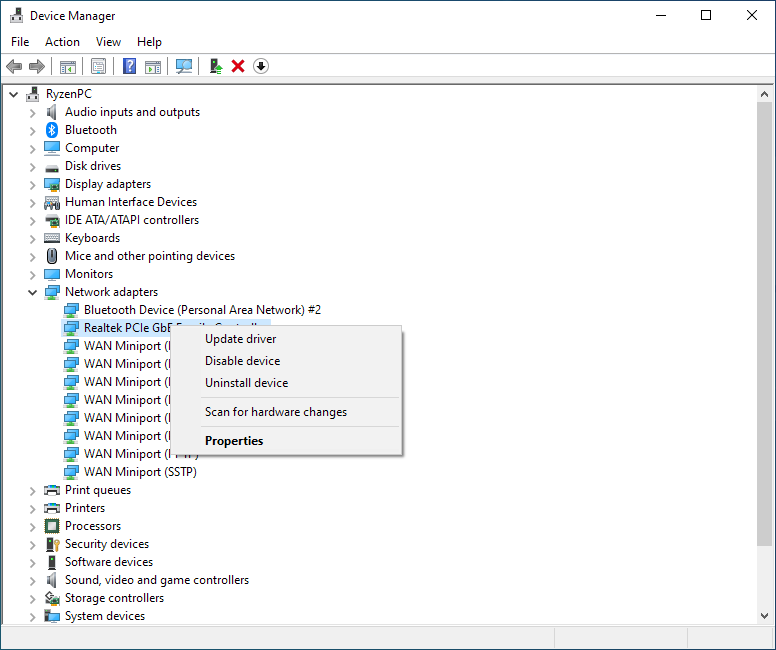
Locate and expand Network adapters. Now, find your network card and right-click it, then select Properties from the drop-down menu.

In the pop-up window, switch to the Advanced tab and you will see all the properties available for this network. Then, find Wake-on-LAN property and set its value as Enabled and click OK.
If you can’t find a Wake-on-LAN section in your adapter’s settings you may need to update the drivers from your Motherboard’s manufacturer support page as the drivers provided by Windows 10 only offer limited options.
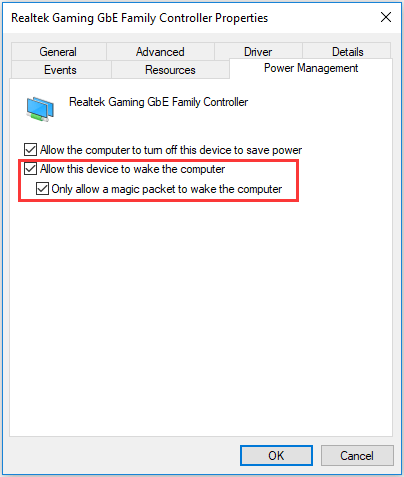
In the Power Management tab make sure that Allow this device to wake the computer and Only allow a magic packet to wake the computer are checked, then click OK.
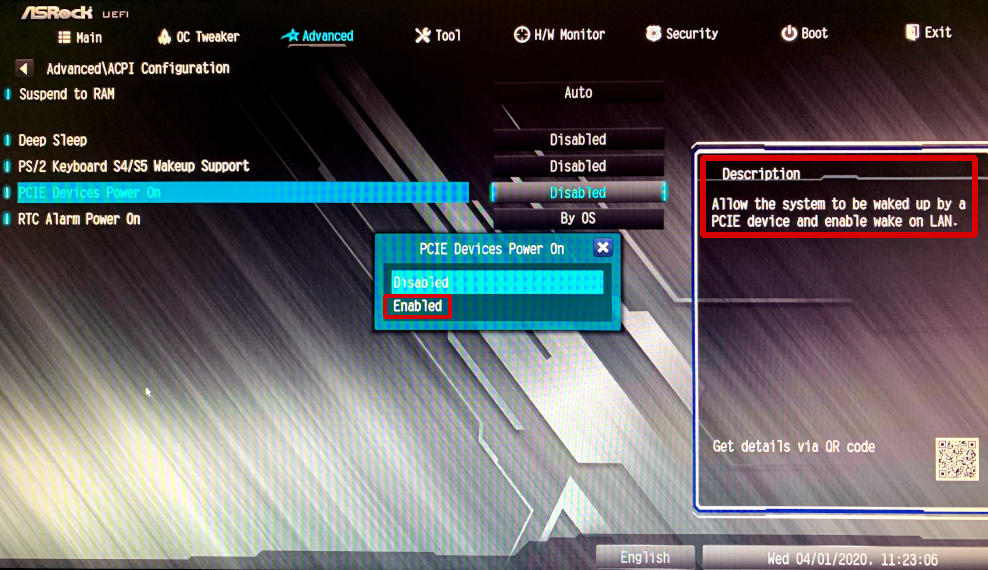
Step 2: Enable Wake-on-LAN in Bios
To make Wake-on-LAN work properly, you also need to enable it in BIOS.
- First, you should enter your BIOS. You can do it by pressing a particular key according to the on-screen prompt while your computer is booting. Commonly, the key is ESC, Delete or F1.
- In the BIOS menu, you are looking for an option that references Wake-on-LAN. Set it as Enabled and save the change. (Bios options vary from motherboard model to model and manufacturer).
Step 3: How to use Wake-on-LAN
After all the configuration in Windows and Bios is done all that’s left is find a compatible application to use Wake on LAN.
Windows: SolarWinds Wake-on-LAN (Free)
Android: Wake on LAN (Free)
Apple: iNet (Free) is an excellent network scanner for iOS and MacOS that also offer WoL functionality
Linux: See this post for details
You will need the MAC address of the network adapter on the computer you are waking up.
Open the Network and Sharing Center from the Settings menu. In the upper-right pane, click on the Ethernet connection. In the Ethernet Status window, click Details, and then you’ll see the physical MAC address.
You will also need the IP address of the computer. It is recommended to keep the computers you set Wake on LAN to on a Static IP address for easy reference. You can see this post for details.
Troubleshoot
If Wake on LAN is not working and you went over the steps listed above and configured everything properly you can also check the below:
◉ Wake on LAN uses certain ports to send the magic packets (usually port 9 or port 7). If the application you chose lists a port you may need to enable port forwarding on your router so that the port is correctly directed to the device you want to wake up. See this post on Port Forwarding for details.
◉ You should also enable the port in Windows Firewall. Open Start menu and search for “Windows Defender Firewall”. From there create a new rule in the Inbound Rules section and open the port listed in your Wake on LAN app. Save changes and reboot the system.